May 2026
Targeting Screen Updates
We’ve released an improvement to the Countries column in the Targeting screen that adds an easier way to exclude specific countries from a targeting rule.
What changed?
Previously, selecting “All” in the Countries dropdown automatically selected every country in the system, with no way to remove individual countries from the selection.
Now, selecting “All” will explicitly mark all countries in the list, allowing users to deselect specific countries afterward.
This enables a new targeting flow: target all countries except specific ones, for example, all countries except the US, UK, Germany, and Canada.
Additional UI improvements
To make exclusion targeting clearer and easier to understand, we also updated the display in the targeting rules table.
- Rules would now have an indication if they include or exclude countries.
- If a user excludes up to 10 countries, the UI will display:
Excluded (X): <country list>
* If a user excludes 11 or more countries, the UI will instead display:
Included (X): <included countries>
with the full list of included countries available in the tooltip.
Targeting Screen Updates
We’ve released an improvement to the targeting screen to simplify configuration and reduce manual errors.
What changed?
Previously, targeting required pasting the player URL manually into a free-text field.
This has now been replaced with an auto-populated dropdown menu.
New targeting options
You can now simply select the player type you want to target:
- Horizontal (default option)
- Vertical
These options should be used for all day-to-day production targeting.
Advanced option
We also added an Advanced option that preserves the previous free-text behavior.
This is intended mainly for development and testing purposes, allowing dev teams to target versions that are still under development.
For regular production use, please use only the Horizontal or Vertical options.
Advanced Preview
We’re excited to share that the first phase of the new Advanced Preview experience is now live.
Starting today, when editing a player, you’ll notice a new “Preview” button in the right-hand panel.
Clicking it will open a new tab with a demo article that showcases the player and reflects its:
* Look & feel
* Behavior
* Content
* Monetization logic (using ad placeholders instead of real ads)
This preview is designed to give you a much more accurate representation of how the player will appear and behave in a real article environment.
We’re already progressing on the next (and final) phase of the Advanced Preview experience. This upcoming update will introduce an in-platform pop-up preview that displays both the player itself and a summary of all configured settings, eliminating the need to switch tabs while editing.
Player Settings Updates
As preparation for the launch of the Advanced Preview, we introduced a few UI updates to the Player Settings screen.
At this stage, these changes are purely visual and designed to streamline your workflow. Here is what you can expect to see:
- Removal of the Legacy Preview- We’ve removed the legacy, non-functional preview window to free up space.
- Extended Settings View- To make better use of your screen real estate, the settings panel has been extended, making it easier to manage your configurations.
These updates won’t affect your current player functionality or live settings.
April 2026
An additional sub-menu called “Embed” is under the targeting section (see attached screenshot). This is part of ongoing work related to embedded player targeting.
For now, please do not use the “Embed” sub-menu, as development is still in progress and it is not yet ready for use.
In the meantime, please continue working exactly as before, using the “Injected” sub-menu for all targeting needs.
Location of the new sub-menu:
We'll share another update as soon as we have one.
March 2026
Today, as part of preparing to add a separate targeting screen for embedded players, we added a new sub-menu in Voltax. That means that to access the targeting screen as you previously did, you will now need to follow this path: VMS > Targeting > Inject, instead of just VMS > Targeting.
Nothing else was changed at this update. I will update again once we launch the embedded players targeting screen.
Please share this info with your teams.
Previous flow:
New flow:
January 2026
CSV File Names Now Visible
This applies when uploading a CSV file in:
• External GAM section → External GAM Mapping (Monetization tab)
How does it work?
• After uploading a CSV file, the file name will be displayed in the UI.
• If the file name is too long, it will be shortened with “…”.
• Hovering over the file name will show a tooltip with the full file name.
• Clicking on the file name will download the file to your computer.
• The “Replace CSV file” flow remains exactly the same.
Before a CSV file is uploaded
After a CSV file is uploaded
Hovering over the link
Important note
This update applies going forward, starting today.
• CSV files uploaded before today will not automatically show file names.
• To use the new capability for older files, simply replace (re-upload) the CSV file.
As always, we’d love to hear your feedback. Please let us know if this improvement helps or if you have any comments
Improvements to the VMS Targeting screen
1) Players that appear in the Targeting screen can no longer be deleted, even if they are currently set to 0% of traffic.
If a Player is included in any targeting rule, deletion is blocked. To delete a targeted Player, users must first remove it from all targeting rules where it appears.
This new safeguard prevents the accidental removal of players who are currently in use.
2) Deletion is now supported only from the HQ environment
Voltax environment does not support player deletion any longer, since the Targeting screen exists only in HQ, and accessing the targeting screen is needed in the new flow.
 How it works
-
If a user clicks the Delete icon on a Player that appears in the Targeting screen:
- A pop-up is shown explaining why deletion is blocked
- The pop-up lists all targeting rule IDs, ordered by organization
-
-
Each rule ID includes a shortcut button that:
- Opens the relevant organization's Targeting screen in a new tab
- Automatically scrolls to the specific targeting rule
- Highlights the relevant rule for quick identification
-
-
If a user clicks the Delete icon on a Player that doesn't appear in the Targeting screen:
- The behavior remains unchanged, and the Player can be deleted as before
 Why this matters
- Prevents breaking live setups by deleting in-use Players
- Makes it easy to understand where a Player is used
- Reduces time to resolution with direct navigation to the exact targeting rule
September 2025
New fields added to the Player Configuration
This document outlines the 20 new fields added to the Voltax UI configuration player screens, providing details on their usage and functionality.
Additionally, the fields within the different tabs will be in ‘collapse’ mode to facilitate easier navigation, and we have also made updates to some titles and subtitles.
Appearance Tab
- Title Prefix
- Description: Text added at the beginning of each video title.
-
Type: Text.
- Player Theme
- Description: This setting controls the player's visual appearance and color scheme.
- Values: 'Blue', 'Red', 'Orange'.
-
Default: 'Blue'.
- Float Theme
- Description: This theme configuration setting controls the color scheme of the mini title bar when the player is in floating mode.
- Values: 'Black', 'White'.
- Default: 'white'.
Behavior & Settings Tab
- Initial Quality
- Description: Controls the initial video quality or resolution that the player starts with when a video begins playing.
- Values: 'Auto', 'Low', 'High', or a specific numerical value.
- Default: 'Low'.
- Notes: You can enter a specific resolution value as a number in the text field provided.
- Load Video Track
- Description: Enables AI metadata capture and video analytics tracking.
- Type: Checkbox.
-
Inject Outside The Iframe (name in STN ‘Frame Break Enabled’)
- Description: Injects the player outside of the iframe.
- Type: Checkbox.
-
Enable Barker
-
Description: Enables the Barker feature.
-
Type: Checkbox.
-
Default:
false.
-
API Float Control
- Description: Enables a publisher-controlled floating system.
- Type: Checkbox.
Auto-Skip Settings (for mobile and desktop)
-
Description: These settings control the behavior of the "Keep Watching" feature, which is the engagement feature that allows a user to skip to the next video or continue watching the current video.
- Countdown Time
- Description: Time in seconds that “Next / Stay” buttons are shown
- Type: Text (number).
-
Default: 5 seconds.
-
Keep Watching' timing
- Description: Seconds before 'Keep Watching' triggers next video
- Type: Text (number).
- Default: 30 seconds.
Float Settings (General)
- Description: These settings control the overall behavior of the floating player.
-
Close Behavior
- Description: Controls what happens to video playback when a floating player is closed by the user.
- Values: 'Continue', 'Pause', 'Resume'.
- Default: 'Continue' (video keeps playing).
-
Resume Playback Threshold
-
Description: Controls how much of the player must be visible before automatically resuming video playback when using the "RESUME" float close behavior.
-
Type: Text (percentage).
-
Values: 0-100.
-
Default: 50.
-
Note: Only appears when "Resume" is selected for
Close Player After.
Float Settings (Desktop & Mobile) - Anchoring Options
-
Description: These settings control the behavior of the anchored floating player.
-
Anchor Position
- Description: Controls the vertical placement of the floating player.
- Values: 'Bottom', 'Top'.
-
Default: 'Bottom'.
-
Anchor Threshold (name in STN ‘Float Anchor Percent’)
- Description: Determines the intersection threshold for when a floating video player should appear or disappear.
- Type: Text (percentage).
- Default: 0.
-
Scroll Delay
- Description: A pixel value that represents how far a user must scroll down the page before the floating player is triggered, regardless of intersection with the original player position.
- Type: Text (pixels).
-
Values: 0-999.
-
Enable Floating Width In Pixels
- Description: Enables or disables the option to control the width of the floating video player in pixels.
-
Type: Checkbox.
-
Floating Width In Pixels
-
Description: Controls the pixel width of the floating video player. This field is only active when
Enable Floating Width In Pixelsis checked. -
Type: Text (pixels).
-
Anchor Margins
- Description: Controls the horizontal and vertical margins for the anchored player.
-
Type: Text (pixels).
- Default: 10 for both.
-
Sticky To Top Settings
- Description: These settings control the behavior of the sticky player.
- Sticky Position
- Description: Controls the vertical placement of the sticky player on the screen.
- Values: 'Bottom', 'Top'.
- Default: 'Top'.
- Sticky Margin
- Description: Controls the horizontal margin for the sticky player.
- Type: Text (pixels).
- Default: 0.
-
Mobile Layout
- Description: These settings control the layout of the player in mobile view.
- Width In Landscape
- Description: Controls the width of the floating video player when in landscape mode on mobile devices.
- UI Location: Under Mobile Layout, a text field.
- Type: Text (percentage).
- Values: 0-100.
-
Default: 100.


July 2025
You can now have the float player "target" a specific element on the page.
You’ll now see a new button titled “Specific Element” under the “Anchoring Alignment” section (Behavior tab > Player Behavior > Anchoring Alignment).
Once clicked, a text box labeled “Element ID” will appear; you can type in the ID of the element you want the floating player to stick to.
This will require that the element has an ID, so in some instances, the publisher may need to make updates if the div they want to target doesn't have an ID.
June 2025
Specific times on mid-rolls (screenshot attached) does not work. It will work in the future, if you have any players set with this configuration please change it.
April 2025
Steps to Check the Disable Gallery View
-
Enable the “Disable Gallery view” in the Voltax player config (this option is available only when Enable STN Player is checked)
- Open Screenshot 2025-04-08 at 14.27.20.png
- Open a page with the player.
- Verify that there is no Gallery in the player
March 2025
New Feature Release - first Preroll retry after error
This feature allows us to serve more ads to publishers when latency is not their biggest concern but RPM. When off - on the first Preroll, we try to render an ad and if we have an error, we move forward to the content. When on - if we have an error, we will try and render another ad before we move forward.
Options
- In the player settings, In the Monetization screen, the preroll settings contains the option (default is off).
Notes
- This feature changes the behavior only for the first Preroll in a session.
- This feature can cause a great uplift for the revenue - will render more ads for the player.
- This feature will cause additional latency (time to first content rendering) - we try again to render an ad and it takes time.
Jan 2025
Skip GAM request on first preroll
This feature allows us to ignore GAM in the first preroll.
Options
- In the player settings, In the Monetization screen, the preroll settings contains the option (default is off).
Notes
- This feature will help mostly with programmatic publishers / publishers that suffer from latency / short session publishers. But can be tested on all!
- Basically, can render the first preroll in a session more quickly.
Dec 2024
Multiple Midrolls
This feature allows us additional have multiple midrolls (not just multiple prerolls).
This feature is more aggressive and should be tested carefully but can have big improvements for specific publisher needs.
Options
- In the player settings, In the Monetization screen, the midroll settings contains the schedule and number of slots (see screenshot)
Notes
- This feature will help when we need additional slots available.
- Can be helpful when we need to remove Prerolls (causes delay) but still need the number of slots available - we can discuss the pros and cons of Prerolls separately if needed.
- Please note that multiple midrolls or any fast increase in slots can cause delays and issues on publishers domain behavior - usually will come with removal of Preroll and lower ad scheduling.
Nov 2024
Send Instream when in main view (Do Not Touch)
This feature allows us to send instream requests when the player in main position (not when float or anchor). This is part of our efforts to be in control of the flexibility with request type.
Options
- In the player settings, In the Monetization screen, when setting the player ad placement as 'Accompanying Content' there's a new option (see screenshot)
- You will see a checkbox that once active, controls the maximum number of impressions to be able to serve in the new state.
Notes
Please do not activate this feature for any publisher until further notice! This is a very sensitive subject for all demand partners, and using it in the wrong places will harm our relationships.
We will start testing for internal domains only - and this is still in review.
Don't play ads when not in view
This feature allows us additional control of the rendering of Ads - it will operate separately from the other options we currently have for that - mainly 'auto pause on tab switch' which is on STN's UI control and not Voltax.
Options
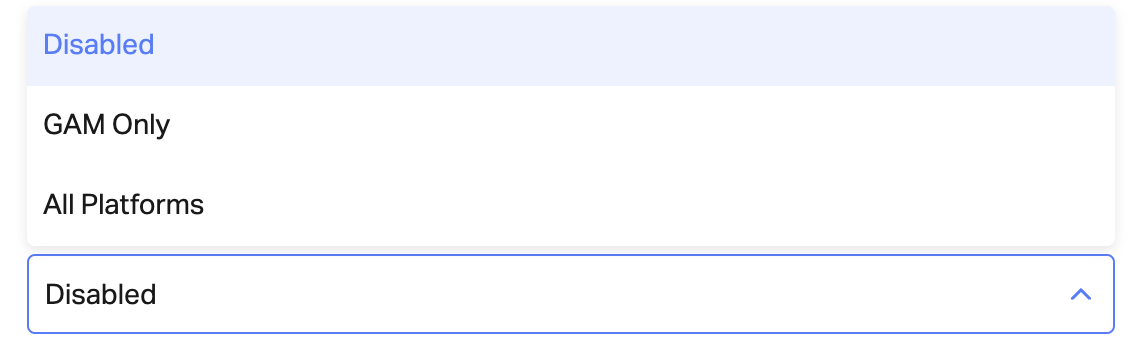
- In the player settings, In the Monetization screen, there's a new option (see screenshots)
- You will see a dropdown with three options - 'disabled' (default), 'GAM only' or 'All Platforms' - All platforms means for all demand integrations (GAM, Prebid, Amazon, RTB (if applicable) and the AdServer).
Notes
- This feature is mainly focused for Viewability - when enabled, the viewability gets to around 90% (if for GAM only or for all platforms)
- When improving viewability - there's a downside of rendering less ads per embed - please always check the impact - it will be different for every publisher/domain because of the way the page and other settings are behaving there.
June 2022
Video tags filter improvements
- Users can add multiple tags by typing in or pasting multiple comma-separated keywords and then pressing the "Enter" key.
- After users select all tags they want to filter, they should click the “Apply” button for the filter to apply on the video table.
Notes:
- If users add or remove tags and click outside of the filter component (without clicking “Apply”), only the “Applied” tags will appear.
- The “Apply” button is disabled as long as no changes additional changes were made that are different from the existing filtering that is applied.
May 2022
Adding a video-level CTA (Call To Action) button
We have enabled users to add a video-level CTA. To do so, follow the steps below:
- In the VMS, go to the "Edit Video" screen (by clicking on a video item within the table)
-
Scroll down to the "Metadata" section and click on the "Call To Action Button" toggle
- Enter the "Text" field with the CTA text that will appear on top of the video
- Then paste/type the URL in the "Link" field, which users will be directed to upon click
- Click on the "Save" button on the top-right part of the screen
Please visit How to add a Call-To-Action button on a video level for additional notes.
Configuring "Custom Parameters" on an Import level
When creating an Import, users can configure the “Custom Parameters” for all videos that will be imported.
Notes:
- This works the same as the video-level custom parameters
- The configured custom parameters won't apply retroactively to previously imported videos, only to videos that will be imported from that point onwards (same logic as the rest of the Imports configurations).
April 2022
Copy & Paste Video Tags
Adding multiple video tags:
Multiple tags can be added by typing in comma-separated keywords and pressing "Enter".
Example inputs:
- tag1,tag2,tag3,tag4
- tag1, tag2, tag3, tag4
Copy tags from a video/import:
Click on the “Copy tags” text link that appears beneath the tag “chips” added to each video/import.
After clicking, the text component will change for a second to “Copied” with a checkmark (as an indication for successfully copying the tags).
After the tags are copied, they can be pasted under the "Video Tags" field.
Notes:
- Clicking on the “Copy tags” will take all existing tags that were added and copy them as a long comma-separated string of text (that will be supported when pasting it and pressing "Enter")
- If no tags are added, the "Copy tags" text link will not appear
Bulk updating of Videos- Restrictions
Following the release of "Bulk update," VMS users now have the additional ability to add or remove restrictions from multiple videos at once.
To edit and update videos in bulk on the VMS, follow the guidelines below:
First, select the videos you wish to edit by checking the boxes next to them.
Then, click on the "Edit" icon that will appear on top of the table.
Once the video restriction has been selected, click on the "Update" button to start the updating process.
PLEASE REVIEW the Videos Bulk Updating guide in the help center for a full overview of the feature and additional notes.
Bulk Updating of Videos- Tags
Following the release of "Bulk Delete," VMS users now have the additional ability to add or remove tags from multiple videos at once.
To edit and update videos in bulk on the VMS, follow the guidelines below:
First, select the videos you wish to edit by checking the boxes next to them.
Then, click on the "Edit" icon that will appear on top of the table.
March 2022
Continue working while uploading videos (Unblocking UI)
VMS users can now continue their work in Voltax while videos are being uploaded to the platform.
After uploading a video to Voltax, users will be able to view the uploading progress status (%) on the bottom right part of the screen.
See below the various behaviors of the progress status component:
- Success status: When the upload process was completed (not including the "processing" phase of the video)
- Canceled status: When the users click on the "X" button within the component while the video is uploading
- Error status: If an error occurs, users are required to re-upload the video
Important notes:
- Only the user who uploaded the video will be able to view the uploading progress status
- If users exit Voltax, close or refresh the browser tab, lose internet connection, or shut down the computer - The following pop-up will be shown:
Keep in mind that if users click on the "Leave" button (or “Reload” in case of refreshing the browser), the uploading process will be canceled. -
While a video is uploading, users are able to upload additional videos.
Bulk Deletion of Videos
We now enable VMS users to delete multiple videos at once. See below the guidelines for bulk deleting videos from the VMS:
First, select the videos you wish to delete by checking the boxes next to them.
Then, click on the "Delete" icon that appears on top of the table.
PLEASE REVIEW the Bulk Deletion of Videos guide in the help center for a full overview of the feature and additional notes.
January 2022
New "Closed Captions" field in the "Edit Video" screen
The "Edit Video" screen has a new field called "Closed Captions" that contains the URL to a captions file that is auto-created (in VTT format) when a new video is added to Voltax.
It's not recommended for users to change/edit the URL.
It might take a few seconds or minutes, depending on video size, from the time the video was added to the library until its captions and URL are generated.
January 2022
The text for the semantic sharing capabilities has changed.
Instead of “Match Video Contextually”, and its tooltip (“We have a smart algorithm that automatically pairs the content with the most contextually relevant video”), it now says “Share with network” (tooltip: “Sharing with Minute Media’s network will add the video to the Voltax’ Shared Library.“).
When the toggle is activated, videos are automatically added to the pool of videos that are considered by the algorithm.
April 2021
More Videos- Gallery View
The Voltax Video player now has the capability to show additional videos as a gallery within the player itself. Users can easily view the gallery by clicking the “More Videos” button, pausing the video, or simply coming to the first video’s end in the queue.
The gallery view will enrich your initial video with complimentary content from a playlist curated by you or our semantic matching algorithm. These supplementary videos will further engage your readers with highly relevant content, leading to longer time spent on page, higher engagement rates and more revenue.
Differences in Player Size:
-
On a Large or XL player (desktop), the video gallery will appear as a carousel at the bottom of the player, giving users the ability to see multiple additional videos and scroll through the playlist of suggestions.
-
On a Medium player (tablet), the video gallery will appear as a single thumbnail, showing users one additional video at a time and allowing them to scroll through the playlist one-by-one.
- On a Small player (mobile), the video gallery won’t appear as an option to users.
Note: An “Up Next” thumbnail will appear to give users the option to quickly move to the next video.
Feature Behaviors:
The video gallery will appear if one of three scenarios occurs:
- The user clicks on the “More Videos” button
- The user pauses the video they are currently playing
- When there are only five (5) seconds left of the remaining video
Additional Notes:
- If a user closes the gallery via the “X” button, the gallery will remain closed for the video’s duration (including the final five seconds).
- The “Up Next” timer is set to five seconds.
- When a user clicks to scroll through the gallery, the “Up Next” video timer will be reset.
March 2021
CSS Customization Tool
We have added a new tool in Voltax called the CSS Customization Tool, giving users the ability to change their players’ CSS configurations. For example, users can now change the button colors, font, and other stylistic components of the player.
CSS Customization is a set of text-formatting instructions that exist separately outside of the HTML so that you can apply the same set of instructions to every player in your website or more than one website.
How to Use the CSS Customization Tool:
- Pick the element’s ID that you would like to customize, open “inspect” on the Voltax player, and find the ID’s element.
2. Go to the Voltax platform and follow this series of actions: VMS -> Players -> Look & Behavior -> CSS Style. Write a CSS selector for the element you would like to customize.
Important Notes:
- Use the element’s ID without the unique player ID, meaning, in the example, use only mplayer-controls-top-bar without the unique player ID.
- For now, we will need to use the !important property (it will be possible to remove the !important, after future updates in the player).
Changing the Split View Background for Uproxx:
#mplayer-split-view-title-background { background-color: red !important;}
December 2020
Attach Playlists to Single Videos:
We’ve just added the ability to attach a Freestyle, Dynamic, or Semantic playlist to a single embedded video. This new function within the VMS will allow you to select a specific playlist within the same property to compliment the video you have chosen to show on your page.
Playlist attachment will allow publishers to maximize long on-page sessions by increasing their user engagement after the first video, leading to higher revenue in the long run.
Semantic Playlist
-
Users now have the ability to create a Semantic Playlist within Voltax
By using ‘Preferred Tags,’ the user can emphasize certain tags, and the algorithm will give more attention to these topics when creating a playlist
-
By using ‘Exclusive Tags,’ the user can narrow down the pool of videos the algorithm can choose from, effectively removing anything irrelevant from sneaking into the playlist
Ex. If an editor for 90min wants to create a semantic playlist, they might use ‘Football’ and ‘La Liga’ as exclusive tags and ‘Messi’ and ‘Barcelona’ as preferred tags. The algorithm will then only chose from videos tagged with ‘Football’ and ‘La Liga’ within the 90min property and will give a higher rating to videos within this pool tagged with ‘Messi’ or ‘Barcelona.’ This will ensure only the most relevant videos are included in every playlist.
Semantic Playlists utilize Minute Media’s contextual matching algorithm to give the user a playlist directly tailored to the content on the page
Users have the ability to manipulate the algorithm to ensure it’s providing relevant content on every page
November 2020
Digital Rights Management (Restrictive UI):
Minute Media’s Digital Rights Management (DRM) solution allows publishers and content providers to closely monitor and control the rights and restrictions of their content. Minute Media’s Digital Rights Management (DRM) solution allows publishers and content providers to secure and control the rights and restrictions of their content. Anyone using Voltax can now configure restriction templates within the VMS before applying them to individual videos or entire imports.
Publishers and content providers who use Minute Media’s Voltax Video Platform can rest easy knowing that:
1. Their digital assets are protected by multiple levels of security
2. They can restrict access to content by:
Geolocation
URL
Specific Dates
3. They have full control over all of their content at all times
4. Content is secure on every major browser including:
Apple Safari
Google Chrome
Microsoft Edge
Mozilla Firefox
To read more about our DRM Solution, read our one page article
October 2020
Attach Playlists to Single Videos:
We’ve just added the ability to attach a Freestyle, Dynamic, or Semantic playlist to a single embedded video. This new function within the VMS will allow you to select a specific playlist within the same property to compliment the video you have chosen to show on your page.
Playlist attachment will allow publishers to maximize long on-page sessions by increasing their user engagement after the first video, leading to higher revenue in the long run.
WordPress Plugin Upload:
We have added the ability for partners to upload their videos straight to their sites from the WordPress plugin they each have individual access to. Users can manage their video offerings directly from WP, effectively removing a step in the workflow process.

September 2020
Video Upload Progress Bar:
We've just added the ability to overview the progress of videos being uploaded. A progress bar will indicate the status of the video. Two steps happen when you upload a video: Firstly, the video is being added to our servers. Secondly, the video will be split into different renditions (qualities).
May 2020
Recirculation Tool:
We've just launched our in-house recirculation tool, allowing you to increase user engagement and user retention by recycling existing content from your site and turning it into a tailor made video. The videos are dynamically generated and updated from your RSS feed. The setup doesn't take more than a few minutes so just reach out to us if you're interested in trying it out or if you have any questions.