We offer you the ability to fully customize the player you embed on your site. In the following sections, we will show you the tools that you have at your disposal in the player table and player configuration screens.
PLAYER TABLE
In the player table, you can see an overview of and manage all previously created players. The players are sorted in accordance to their last modification date.
Deleting and Duplicating a Player
To delete a player, simply hover and click on the “Delete” icon. You will be asked to confirm your choice within a popup window. To duplicate a player, simply hover and click the “Duplicate” button. Note: deleting a player will remove it from all pages it was embedded in. 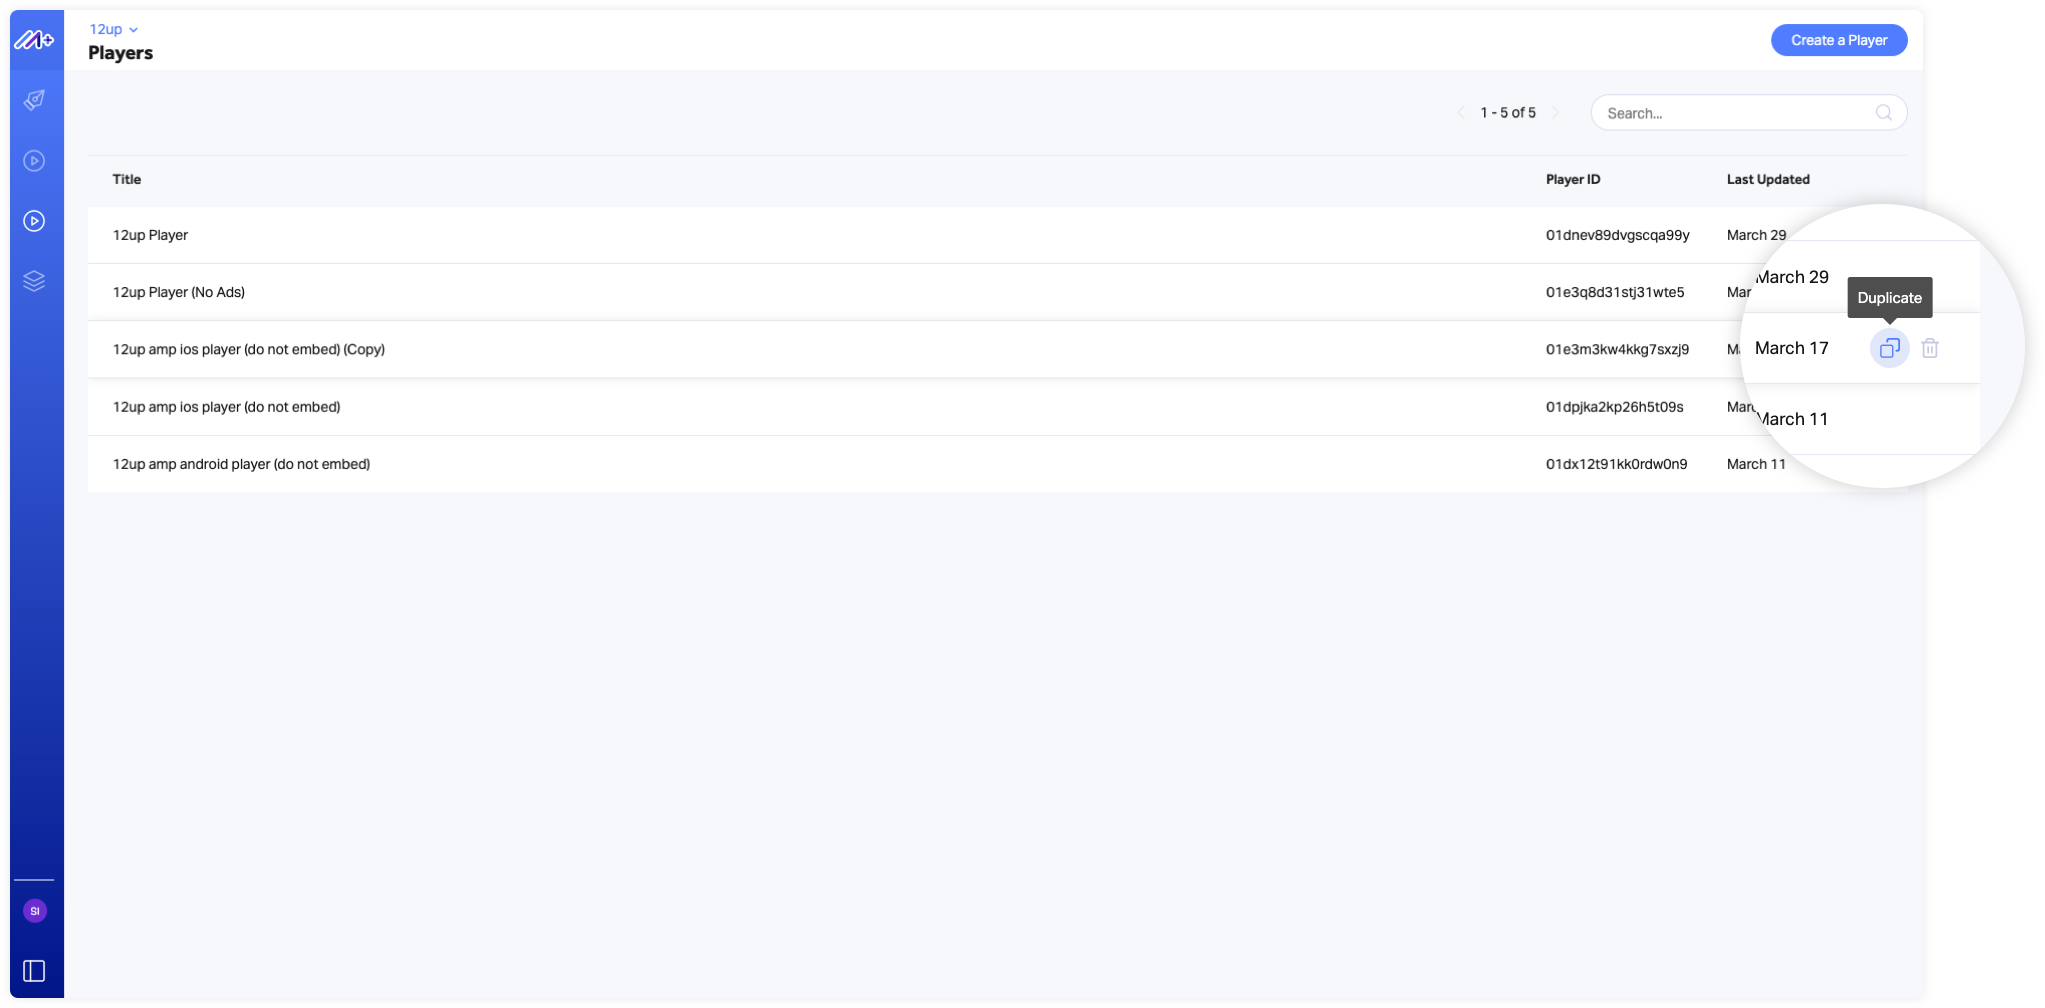
Searching for a Player
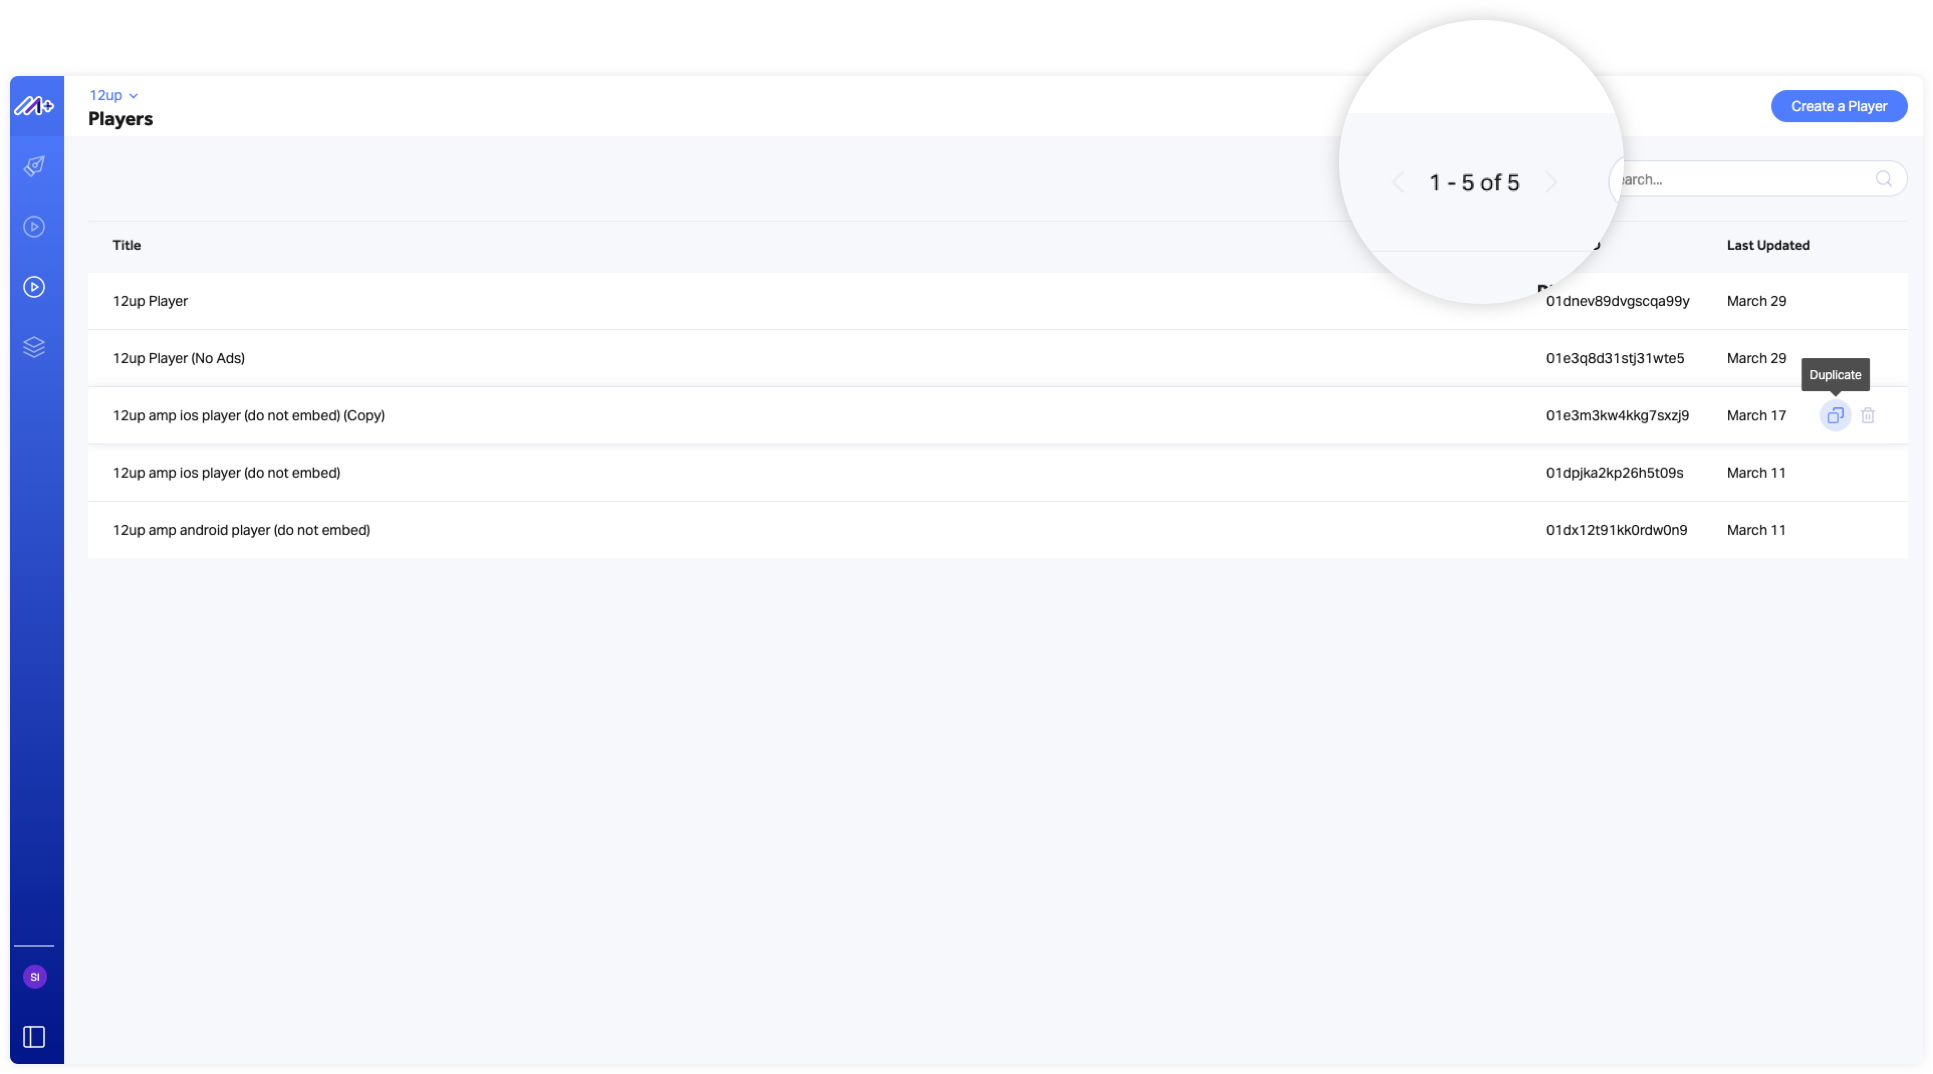
You can search for a specific player by using the bar on the top right. Results will be shown according to titles and player IDs.
Pagination and Total Amount of Players
The pagination element on the top right shows you how many total players are part of this property.
Creating a New Player
To create a new player from scratch, simply click on the “Create a Player” button on the top right corner of the screen. It will redirect you to the player configuration page.
PLAYER CUSTOMIZATION
Player Setup
- Video Name and Playback Method
Within the Voltax player setup, you’ll be required to add a unique player name. You’ll also be able to specify whether you want the video to start playing automatically, when in view, when scrolling or when clicked on within the dropdown.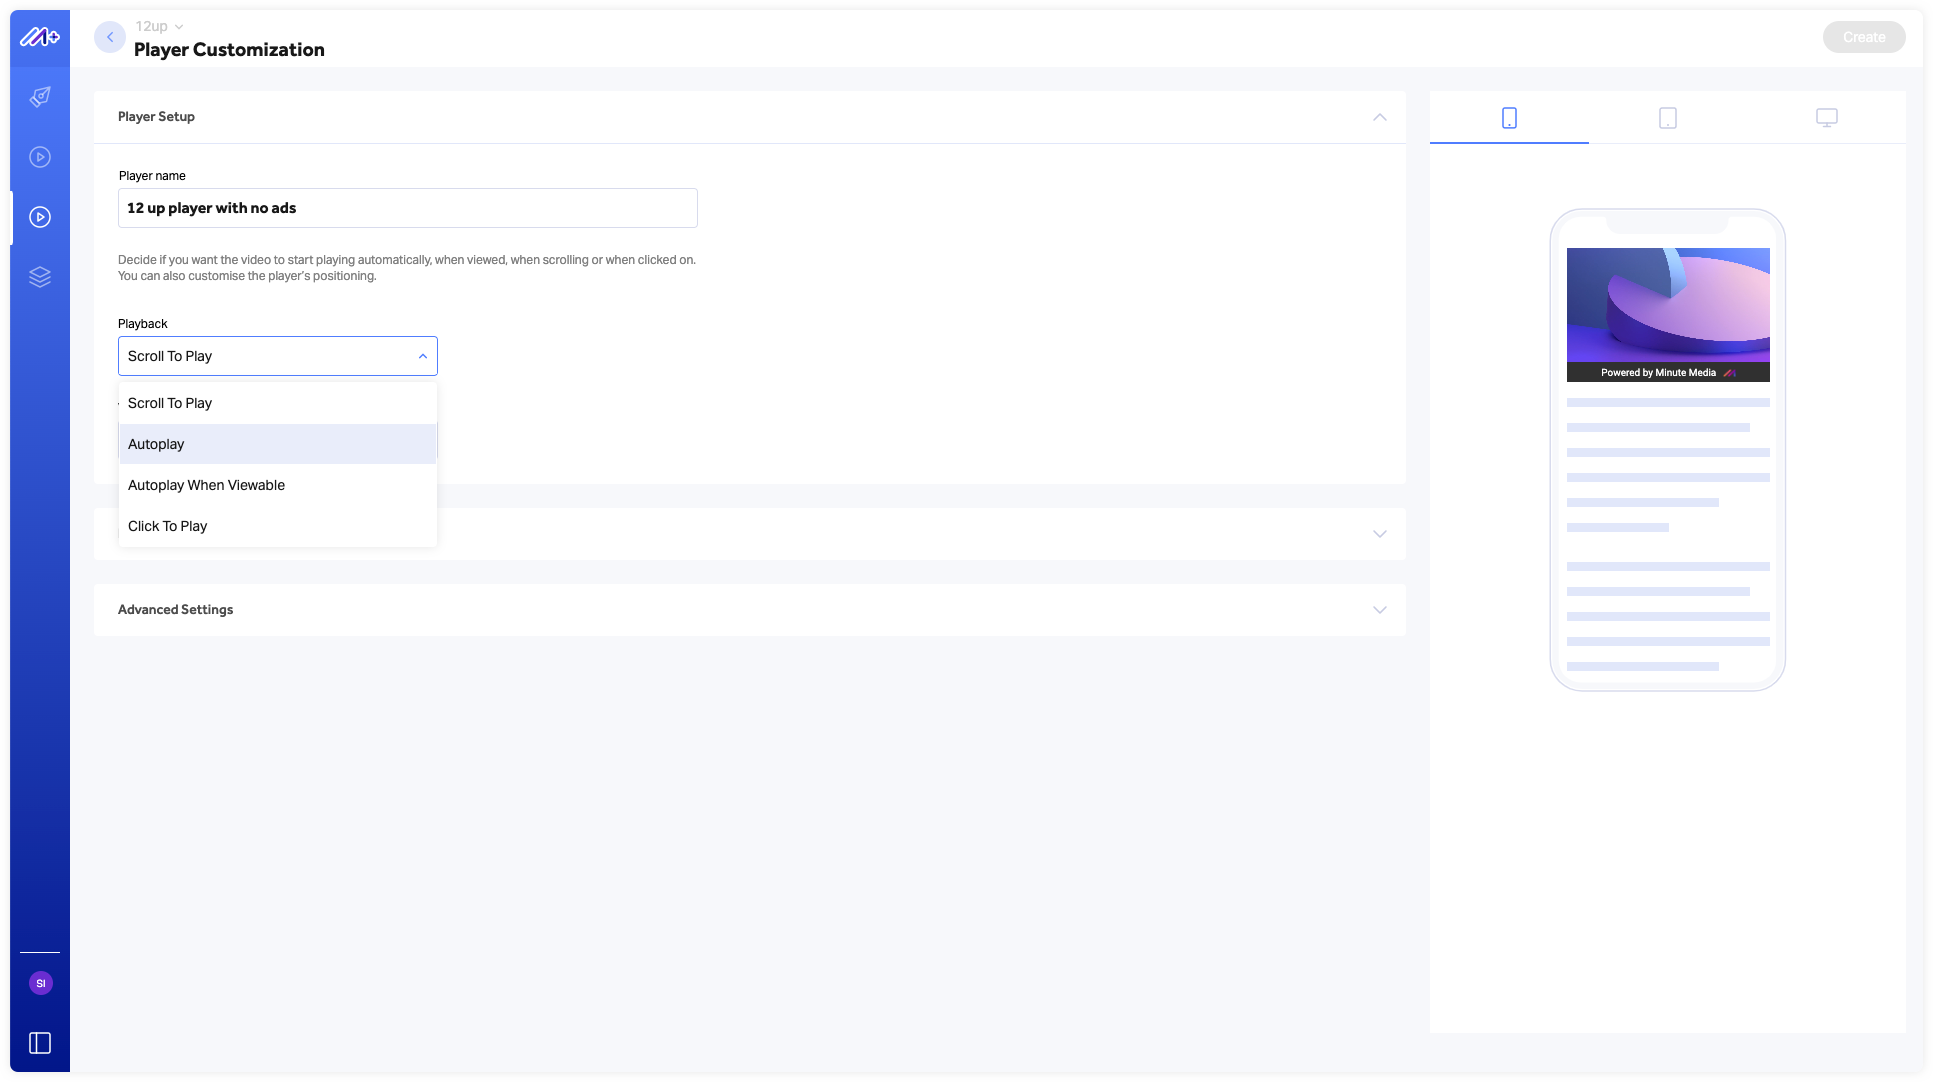
2. Video Placement
You also have control over the video positioning on the page as we offer you “anchoring” or “stick-to-the top” placement options. If you choose to anchor the player, you can define the anchored player’s position, size and appearance. For example, you can define if you want the player to appear on the right or left side of the screen. You can also choose whether you want the user to be able to close the anchored player and the ads, or to be able to pause streaming.
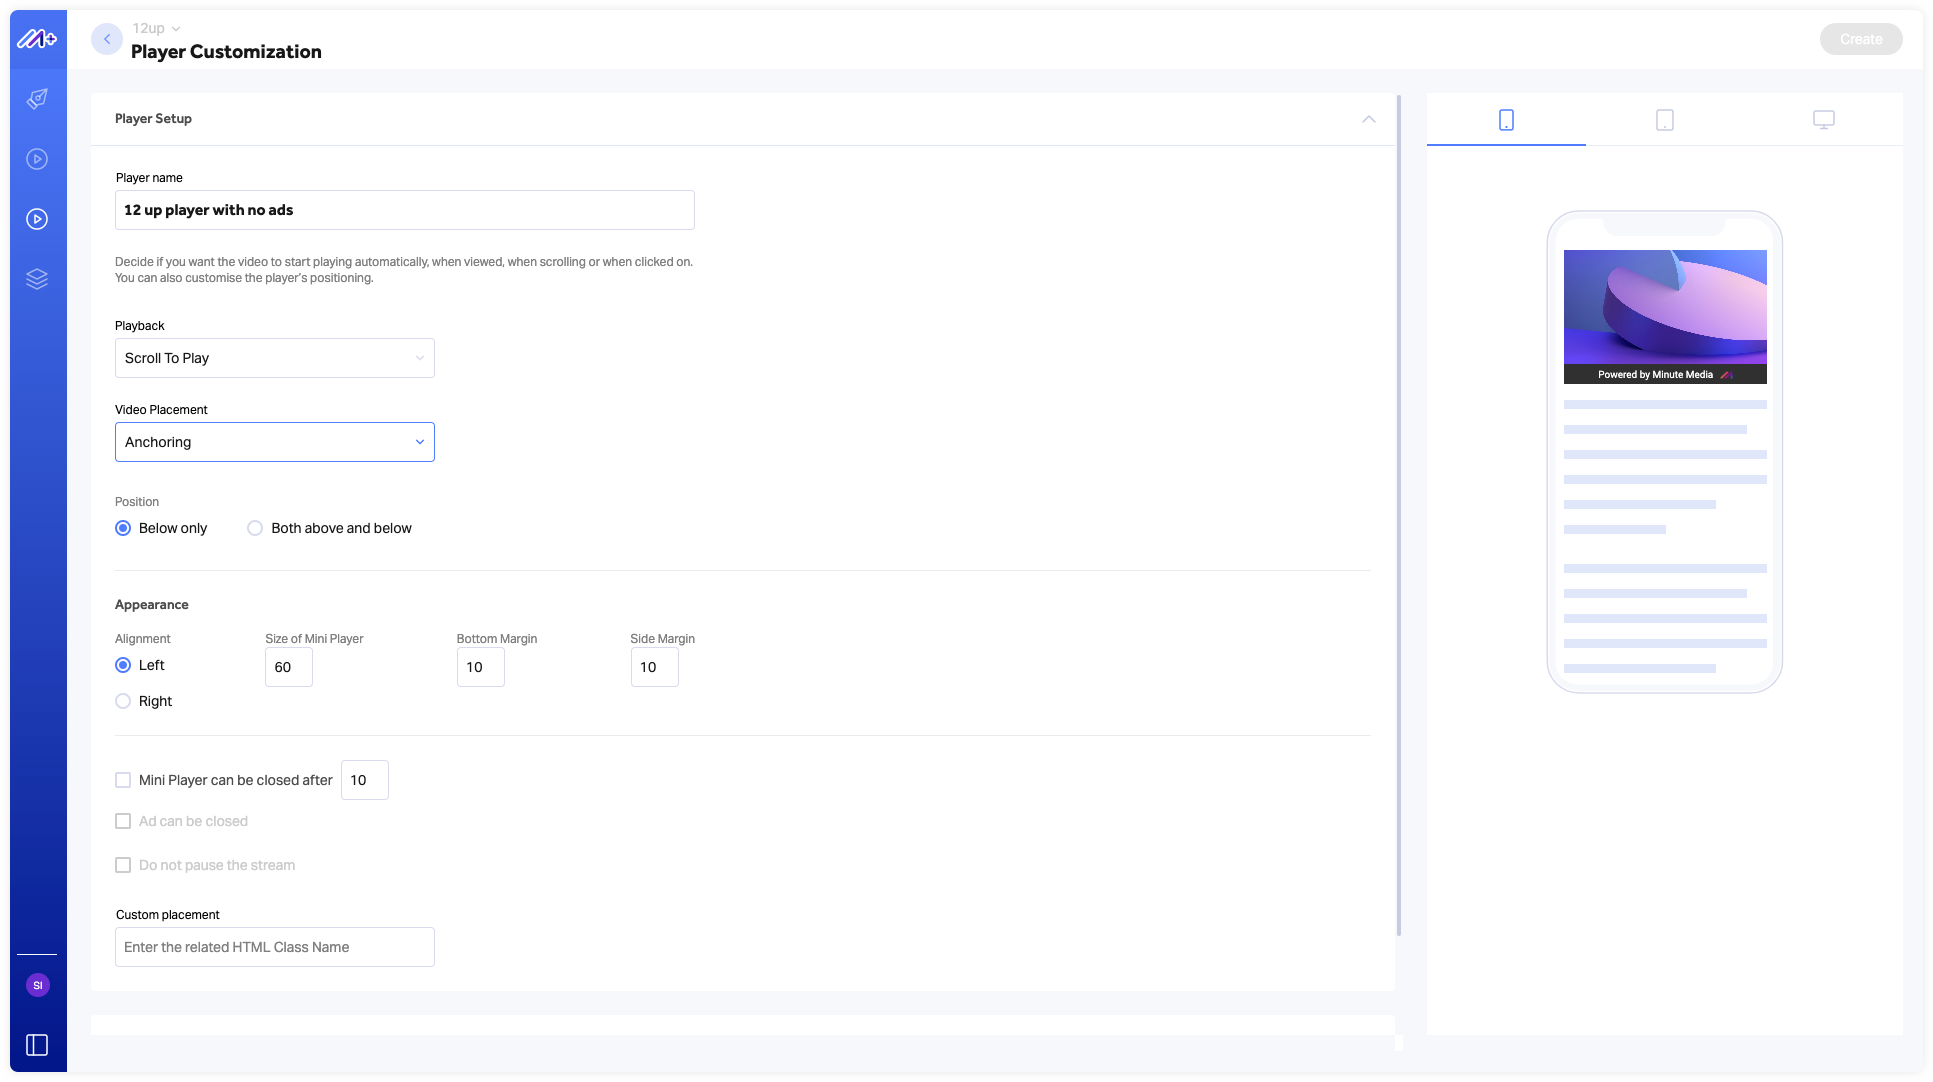
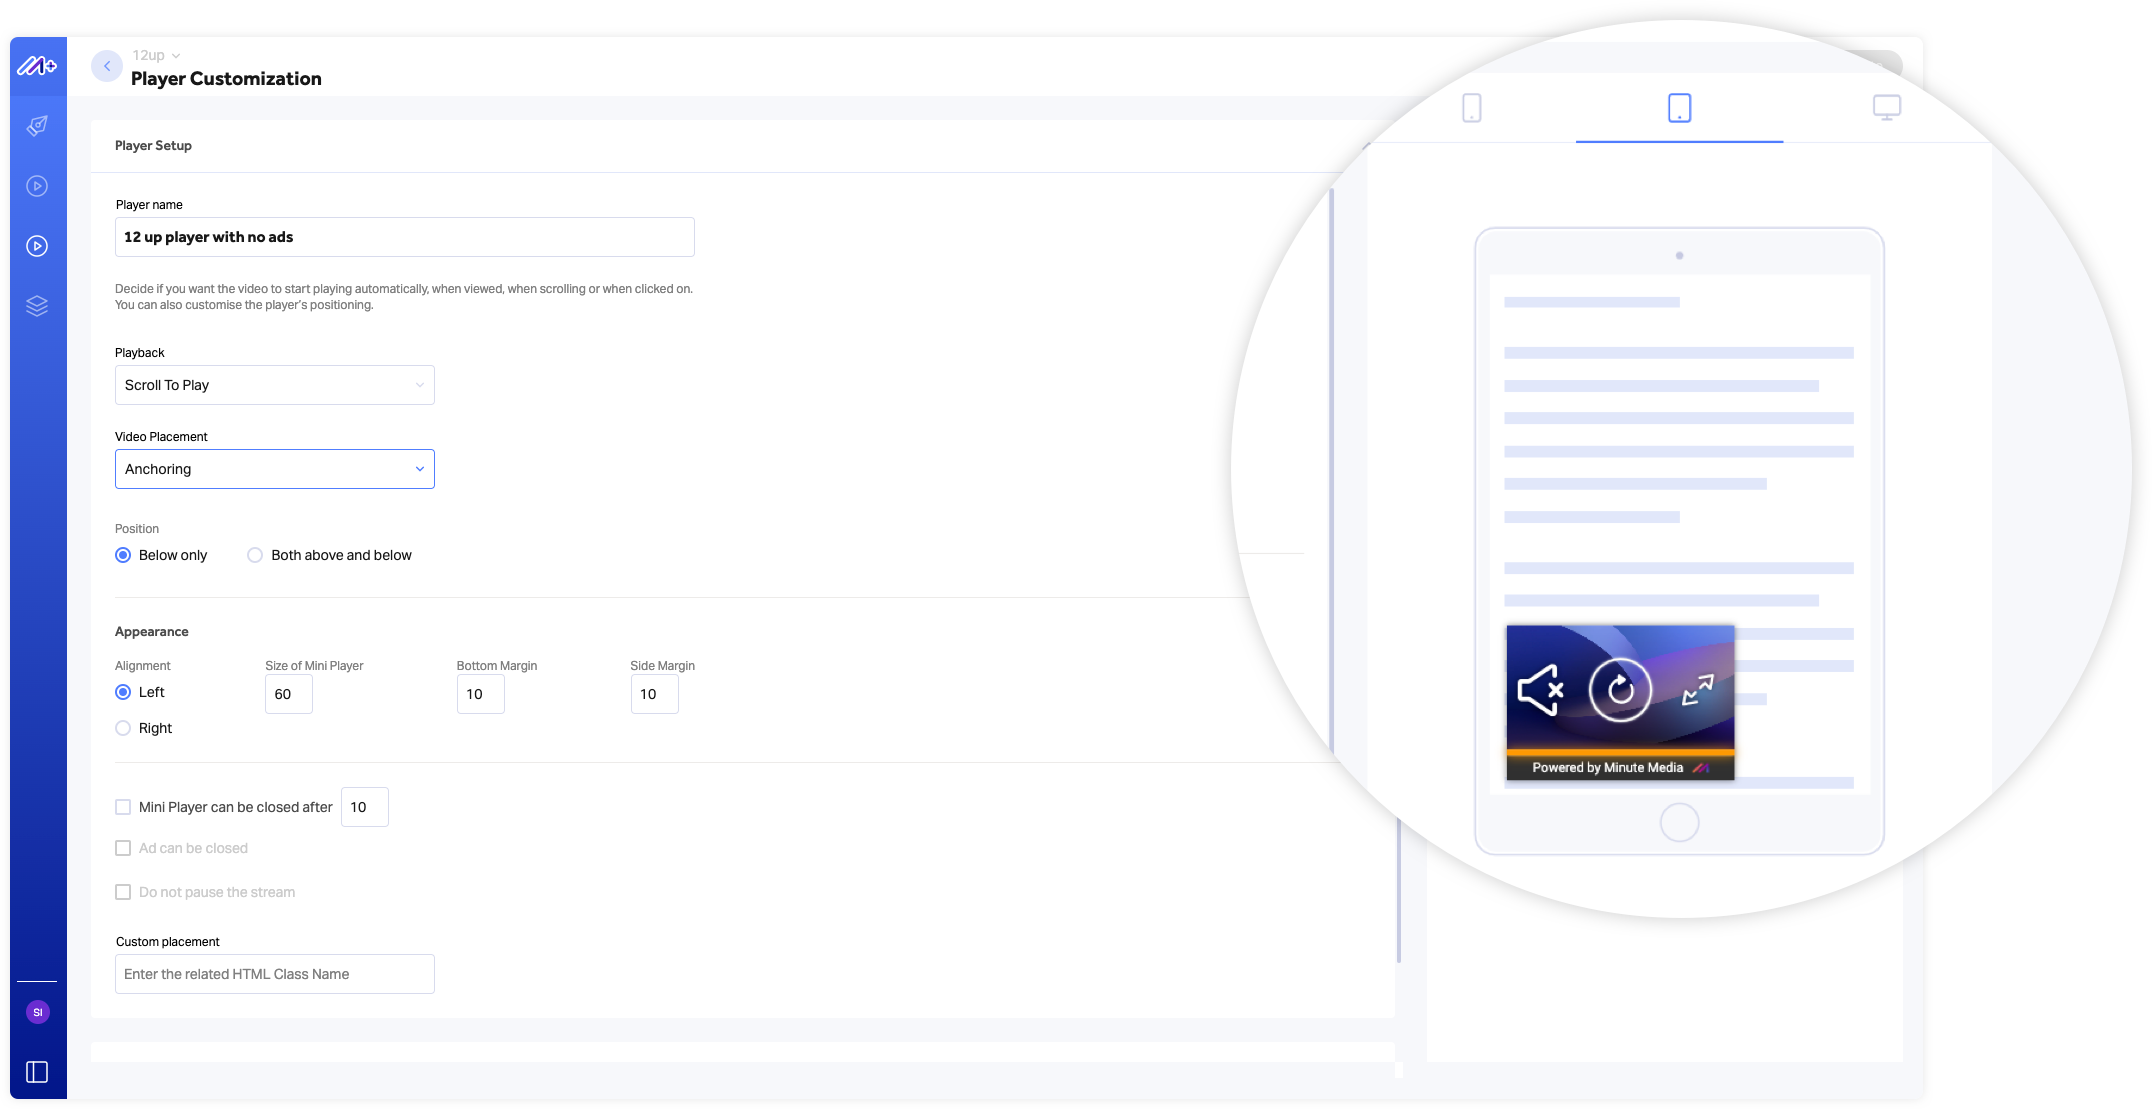
Preview
You can preview the player configurations you choose on the right side of the screen. The player will instantly display the behaviors you’ve defined.
Look & Feel
You have the ability to configure the seek bar colours by adding the HEX code. You can also choose whether or not you would like to use the “Powered by Minute Media” watermark by using a toggle. 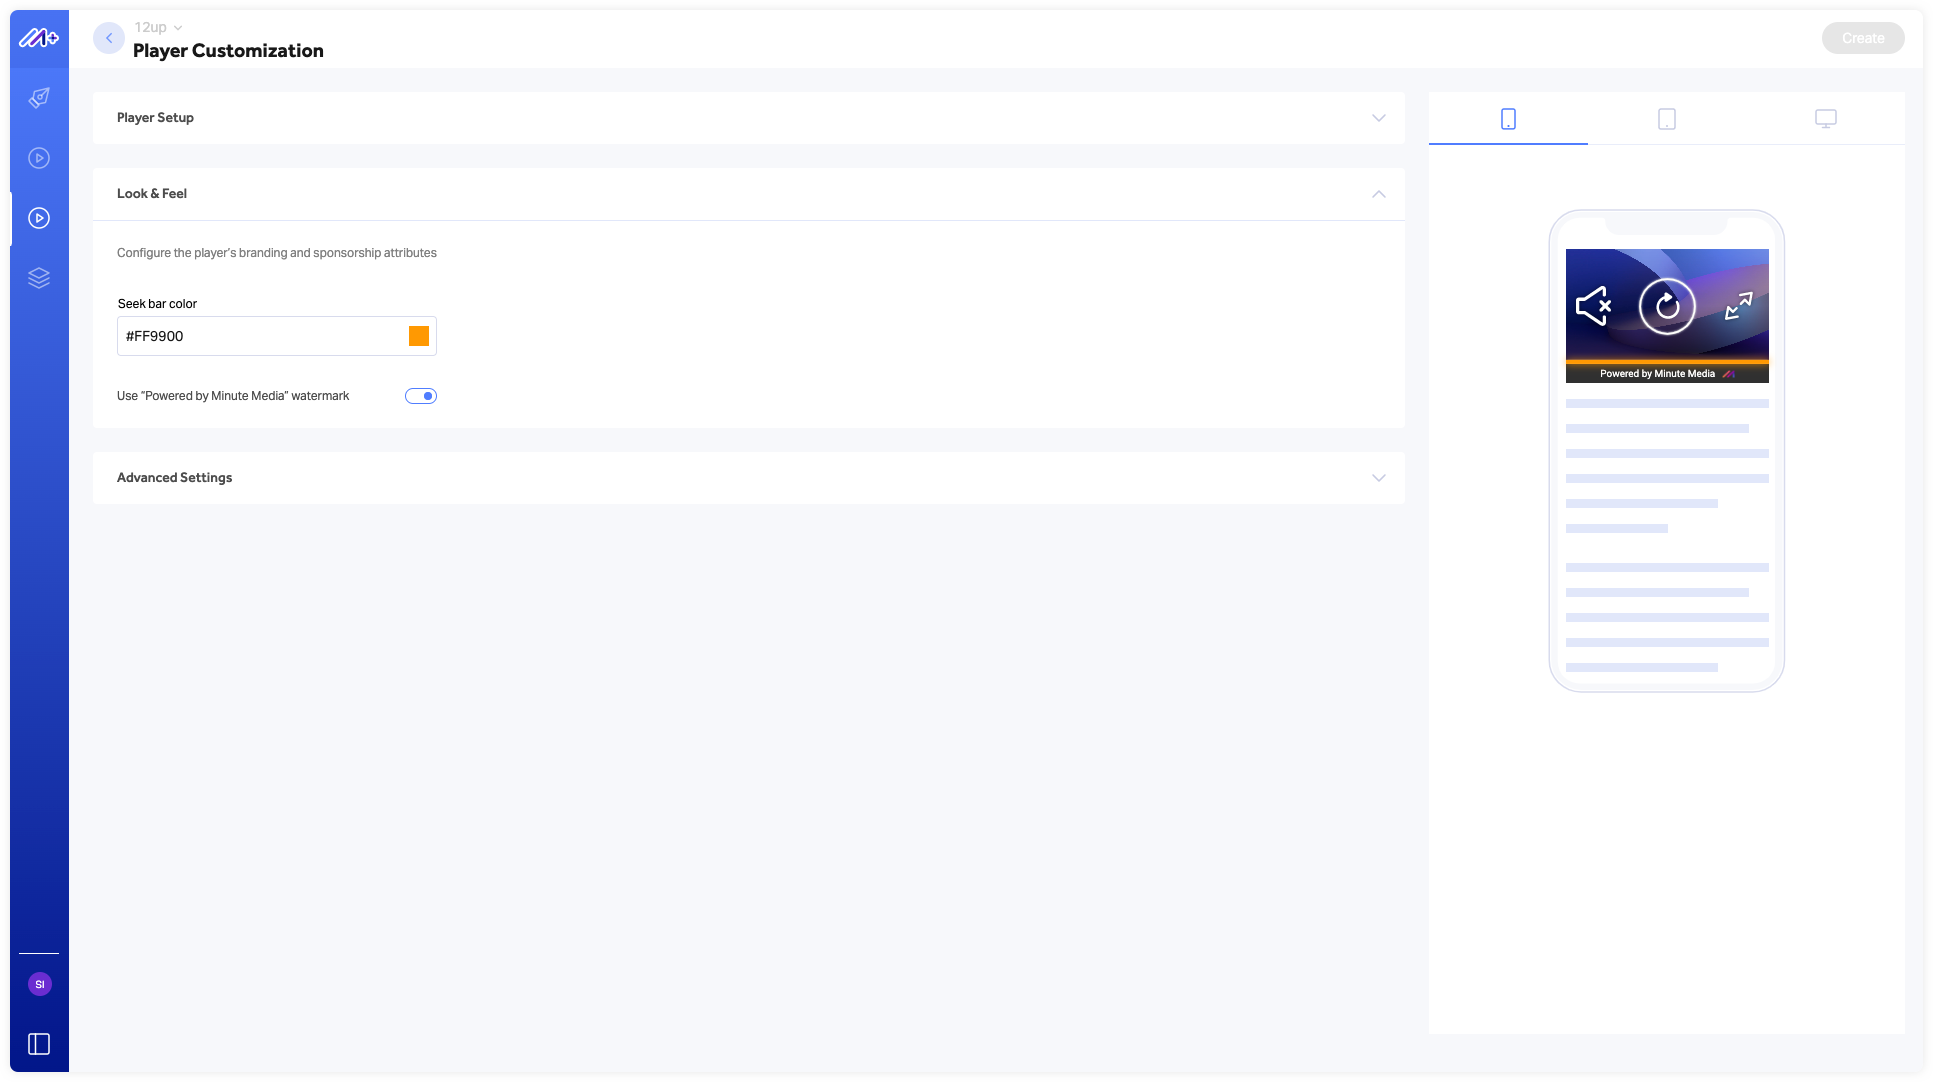
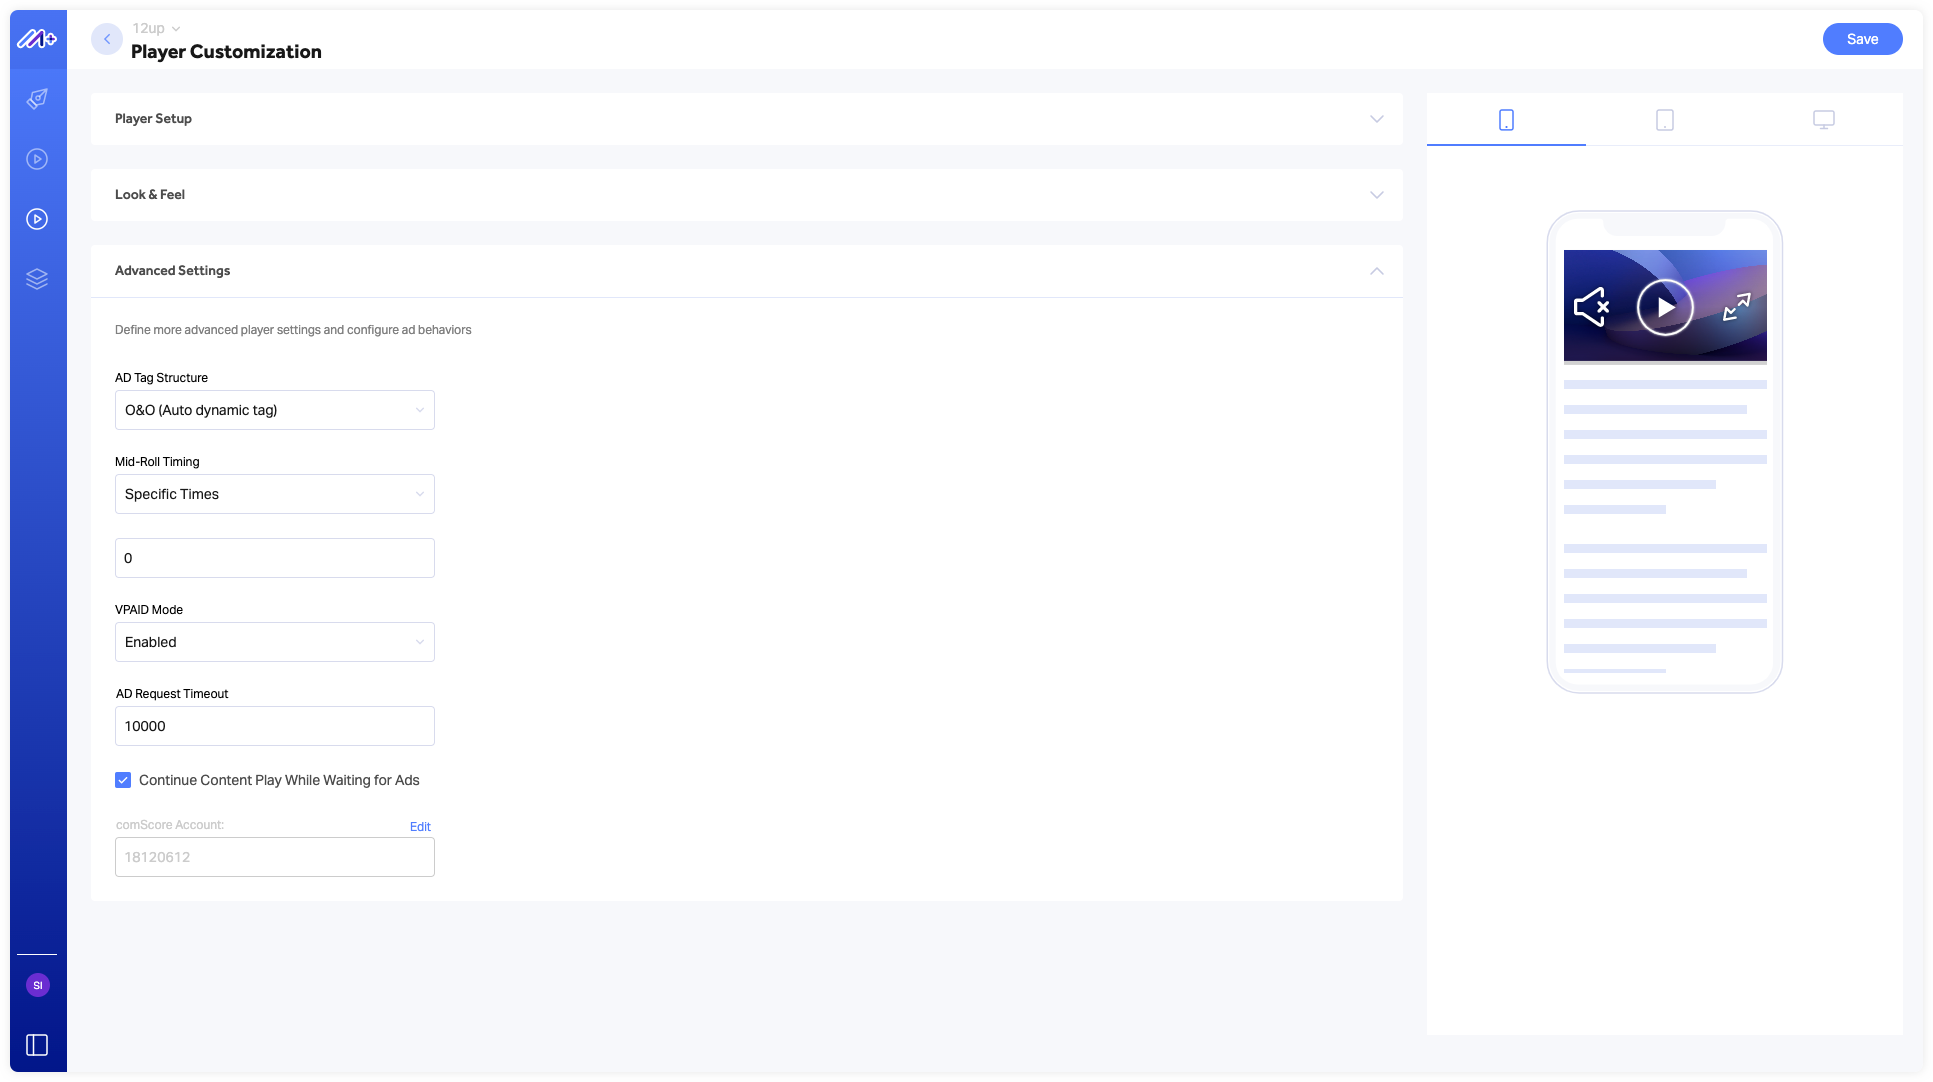
Advanced Settings
This is where you can customize more advanced player settings and configure ad behaviors.
1. Ad Tag Structure
Advance monetization of the videos by enabling preferrable ad tag structure. Choose either “Static” to manually set URL for retrieving video ads, or “Auto Dynamic” to allow the hosting website to decide dynamically which ad URL to call. The hosting site should have the auto dynamic API implemented on its end in order to use this option.
2. Mid-Roll Timing
Manage the mid-roll ad breaks of the player by setting up intervals for their recurrence or by specifying the exact timing you want the ads to run. Add the specific instances you would like the ads to be played in. All intervals are defined in seconds and separated with commas. For example: if you would want the ads to play after 10 and 40 seconds, simply add them to the table in the following format: “10,40”.
3. VPAID Mode
By enabling VPAID mode, you authorise our player to run over the interactive video ads via a cross-domain iFrame, which prevents ad creative from accessing the hosting site scope. Note: this option is set by default. Setting VPAID to “Insecure Mode” will allow the VPAID ads to access your website data. The “Disable” option causes VPAID ads to be skipped, which might cause lower fill rates. Select the option you prefer from the list in the dropdown.
4. Ad Request Timeout
Configure the “Ad Request Timeout” in milliseconds to define the maximum waiting time for the ad server call. We have also pre-set the timeout for loading ad creatives, equaling 15000 milliseconds. Ensure to take both timeouts into account when setting the mid-roll ad breaks for your player. To define the “Ad Request Timeout” simply add your timeout definition in the input field. If, for example, you want the timeout to occur after 1 seconds, simply add “1000” to the input field.
5. Content Play
You can improve user experience by ensuring the player continues playing the content whilst waiting for an ad response. However, please note that if this option is enabled, it mayimpact monetization. Just tick or untick the checkbox to enable/disable.
6. comScore
By default, MinuteMedia’s comScore account is added here. If you want to use your comScore account, click on ‘Edit’ to add your details in the input field.