Digital Rights Management (Restrictive UI):
Minute Media’s Digital Rights Management (DRM) solution allows publishers and content providers to closely monitor and control the rights and restrictions of their content. Anyone using Voltax can now configure restriction templates within the VMS before applying them to individual videos or entire imports.
Voltax Video users have the ability to:
- Protect their digital assets by multiple levels of security
- Restrict access to content by:
-Geolocation
-Domain
-Specific Dates - Have full control over all of their content at all times
- Secure their content on every major browser including:
-Apple Safari
-Google Chrome
-Microsoft Edge
-Mozilla Firefox
Restrictions can be set directly through the Voltax UI.
Creating a Restriction
- Within the dropdown menu under the VMS section on the left side of the page, you will find a button titled ‘Restrictions.’
- Make sure you are on the correct property you would like to create a restriction.
- On the upper-right side of the page, click the ‘Create New” button
- Enter your restriction name, and decide which filter(s) you’d like to use.
-Filter by Geolocation, Domain, or specific dates.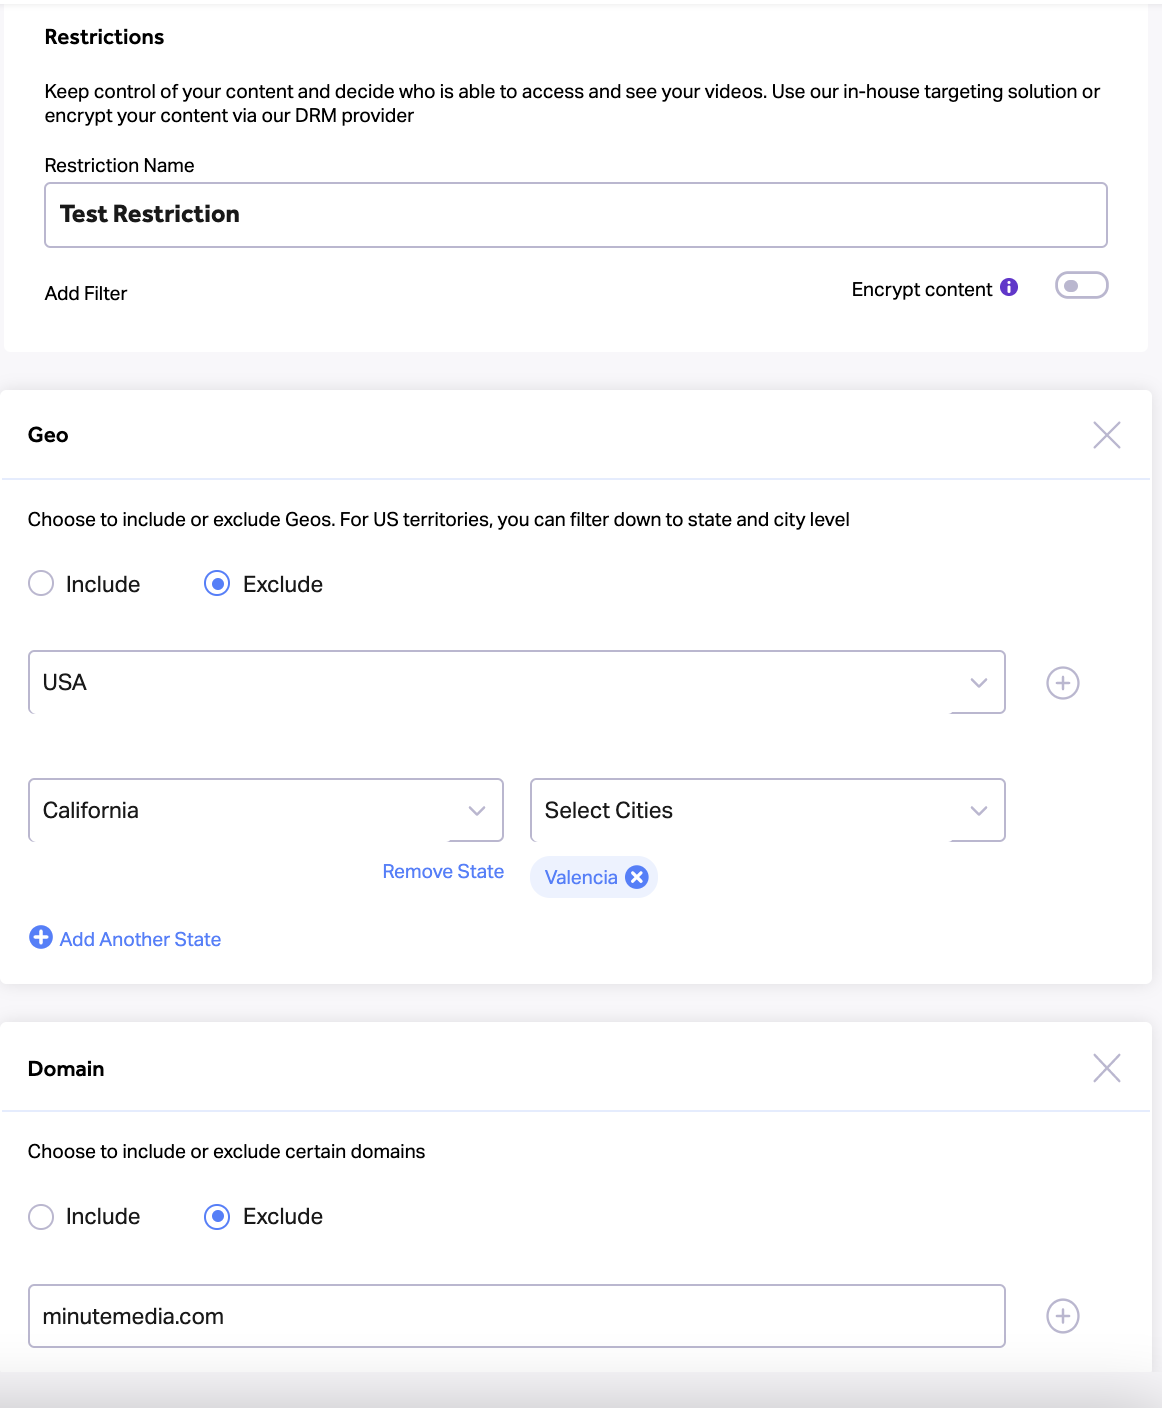
- If desired, toggle the ‘Encrypt content’ switch to ensure your content is fully protected
Select this option if you want to encrypt the content using our Data Rights Management (DRM) provider. Encrypting the content ensures the videos will only be shown on Voltax Video Players. Note: This will come at an additional cost. - On the upper-right side of the page click the ‘Save’ button
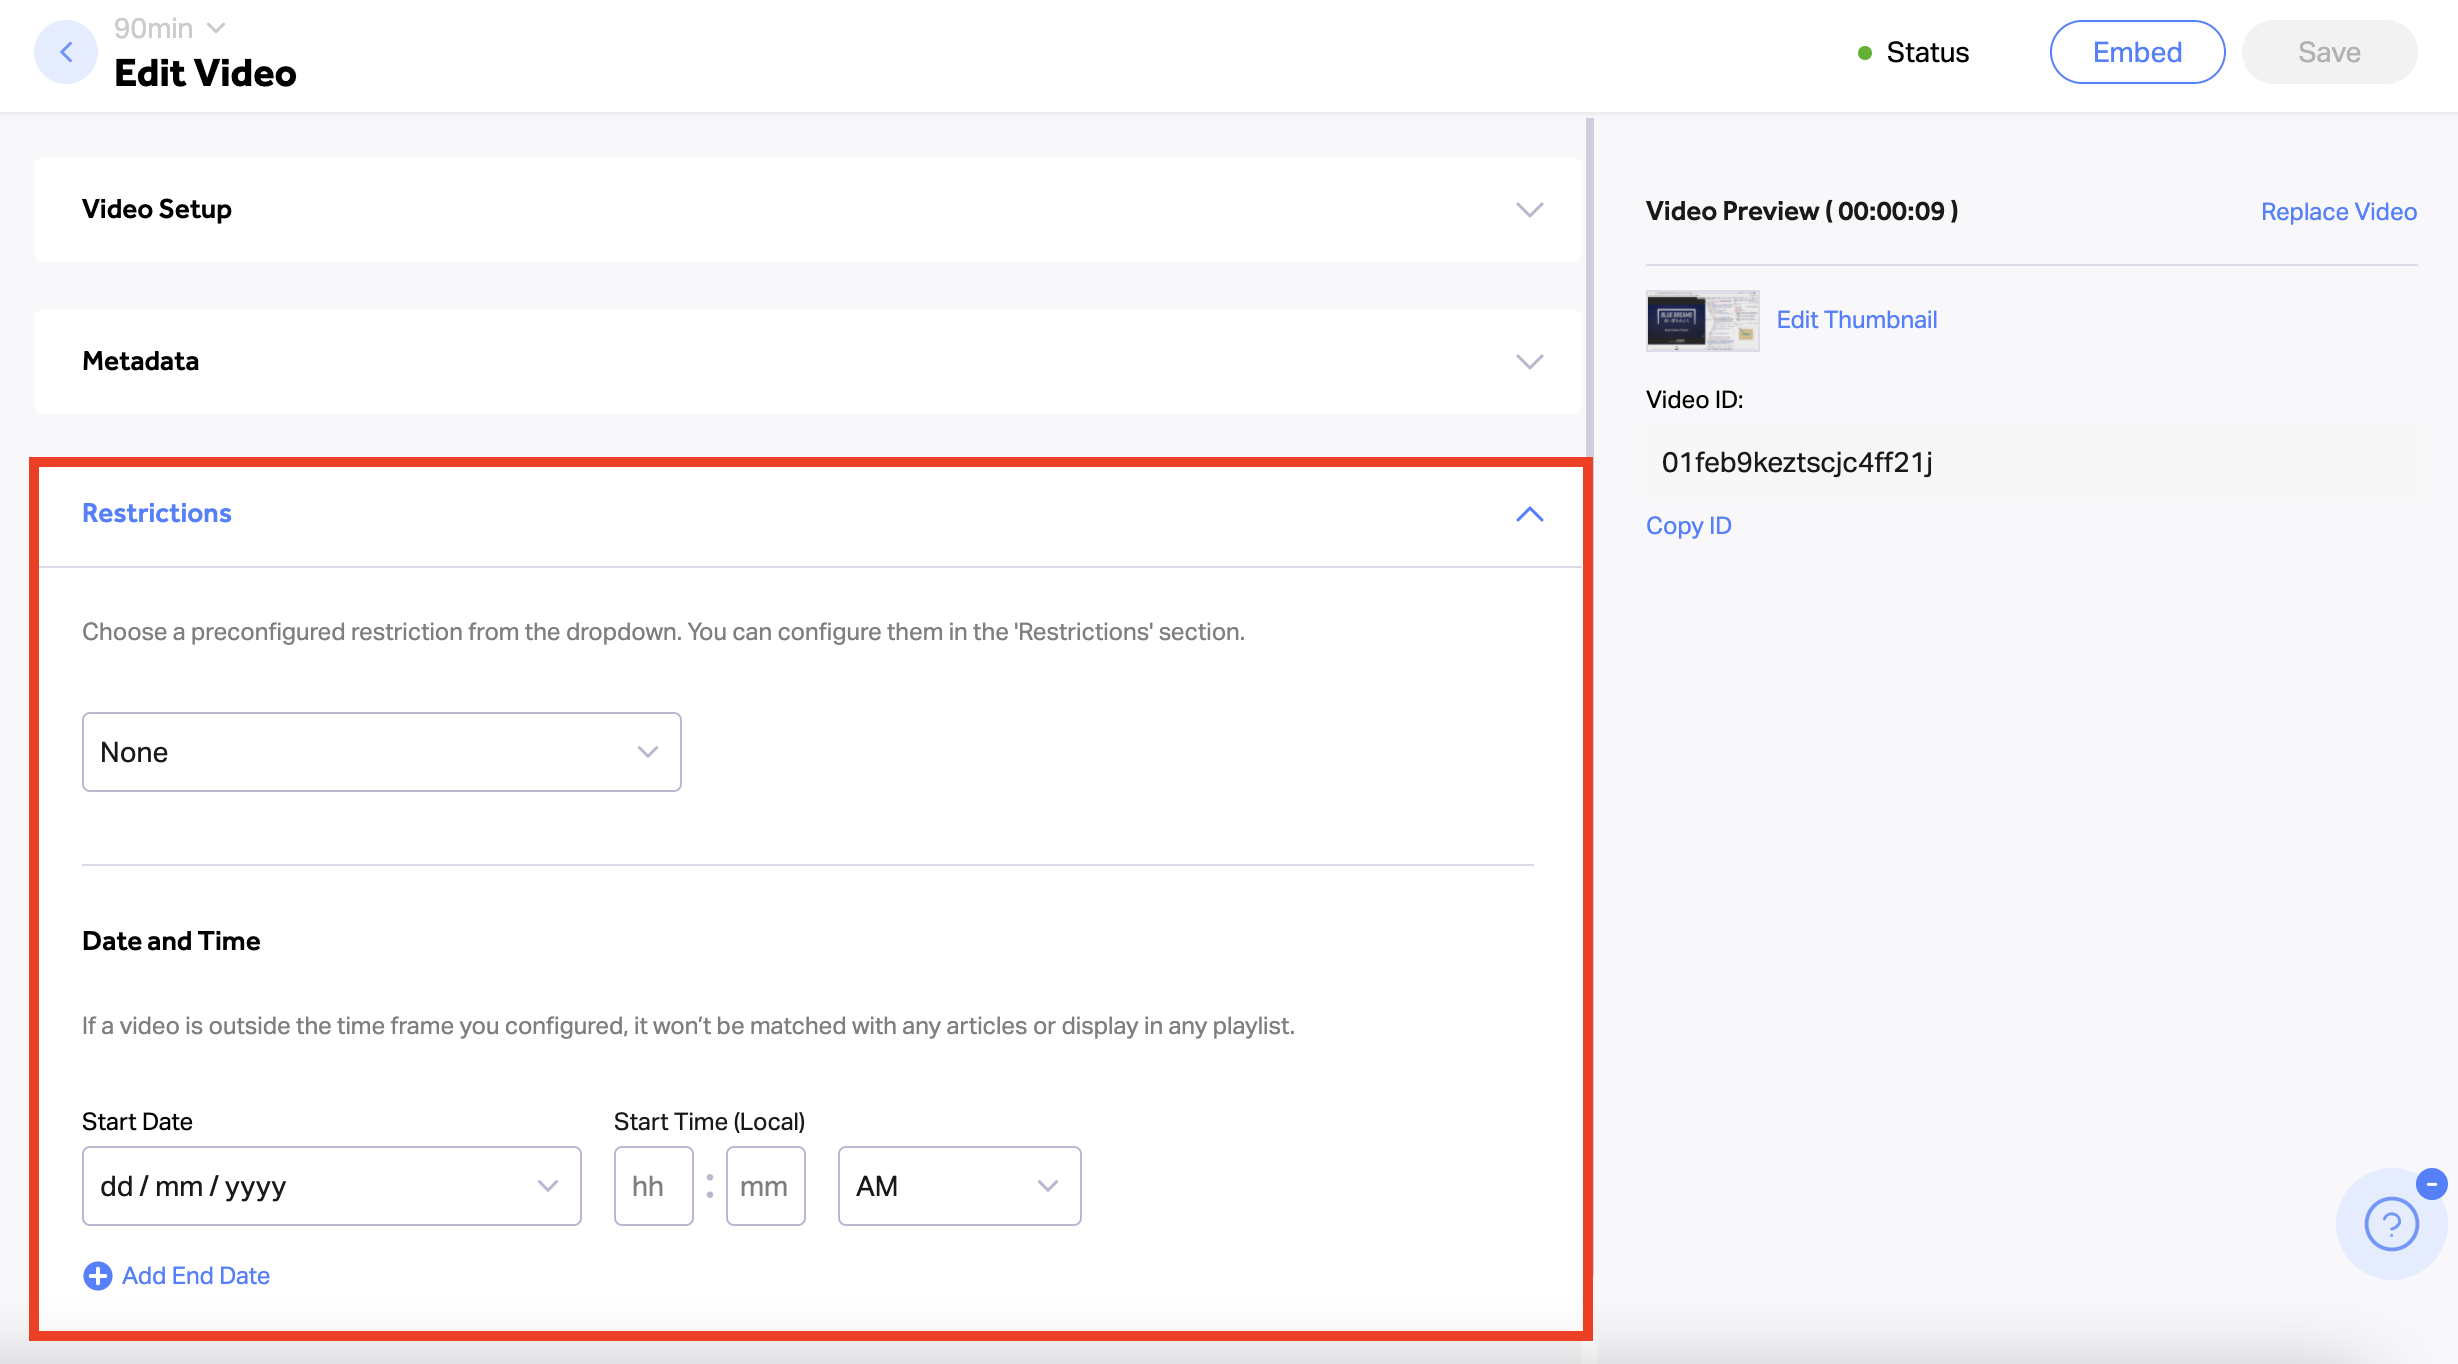
Once you have created a restriction, you must now assign it to your content. You are able to set restrictions for individual videos or entire imports within the VMS.
Setting restrictions for individual videos:
- Make sure you are in the correct property and using the VMS dropdown menu on the left side of the page, make sure you are in the ‘Videos’ section.
- Select which video you want to add a restriction to.
- Scroll down below the ‘Metadata’ section and find the ‘Restrictions’ drop-down menu.
- Select which restriction you’d like to use on the specific video.
- Save your changes in the top-right corner of the page.
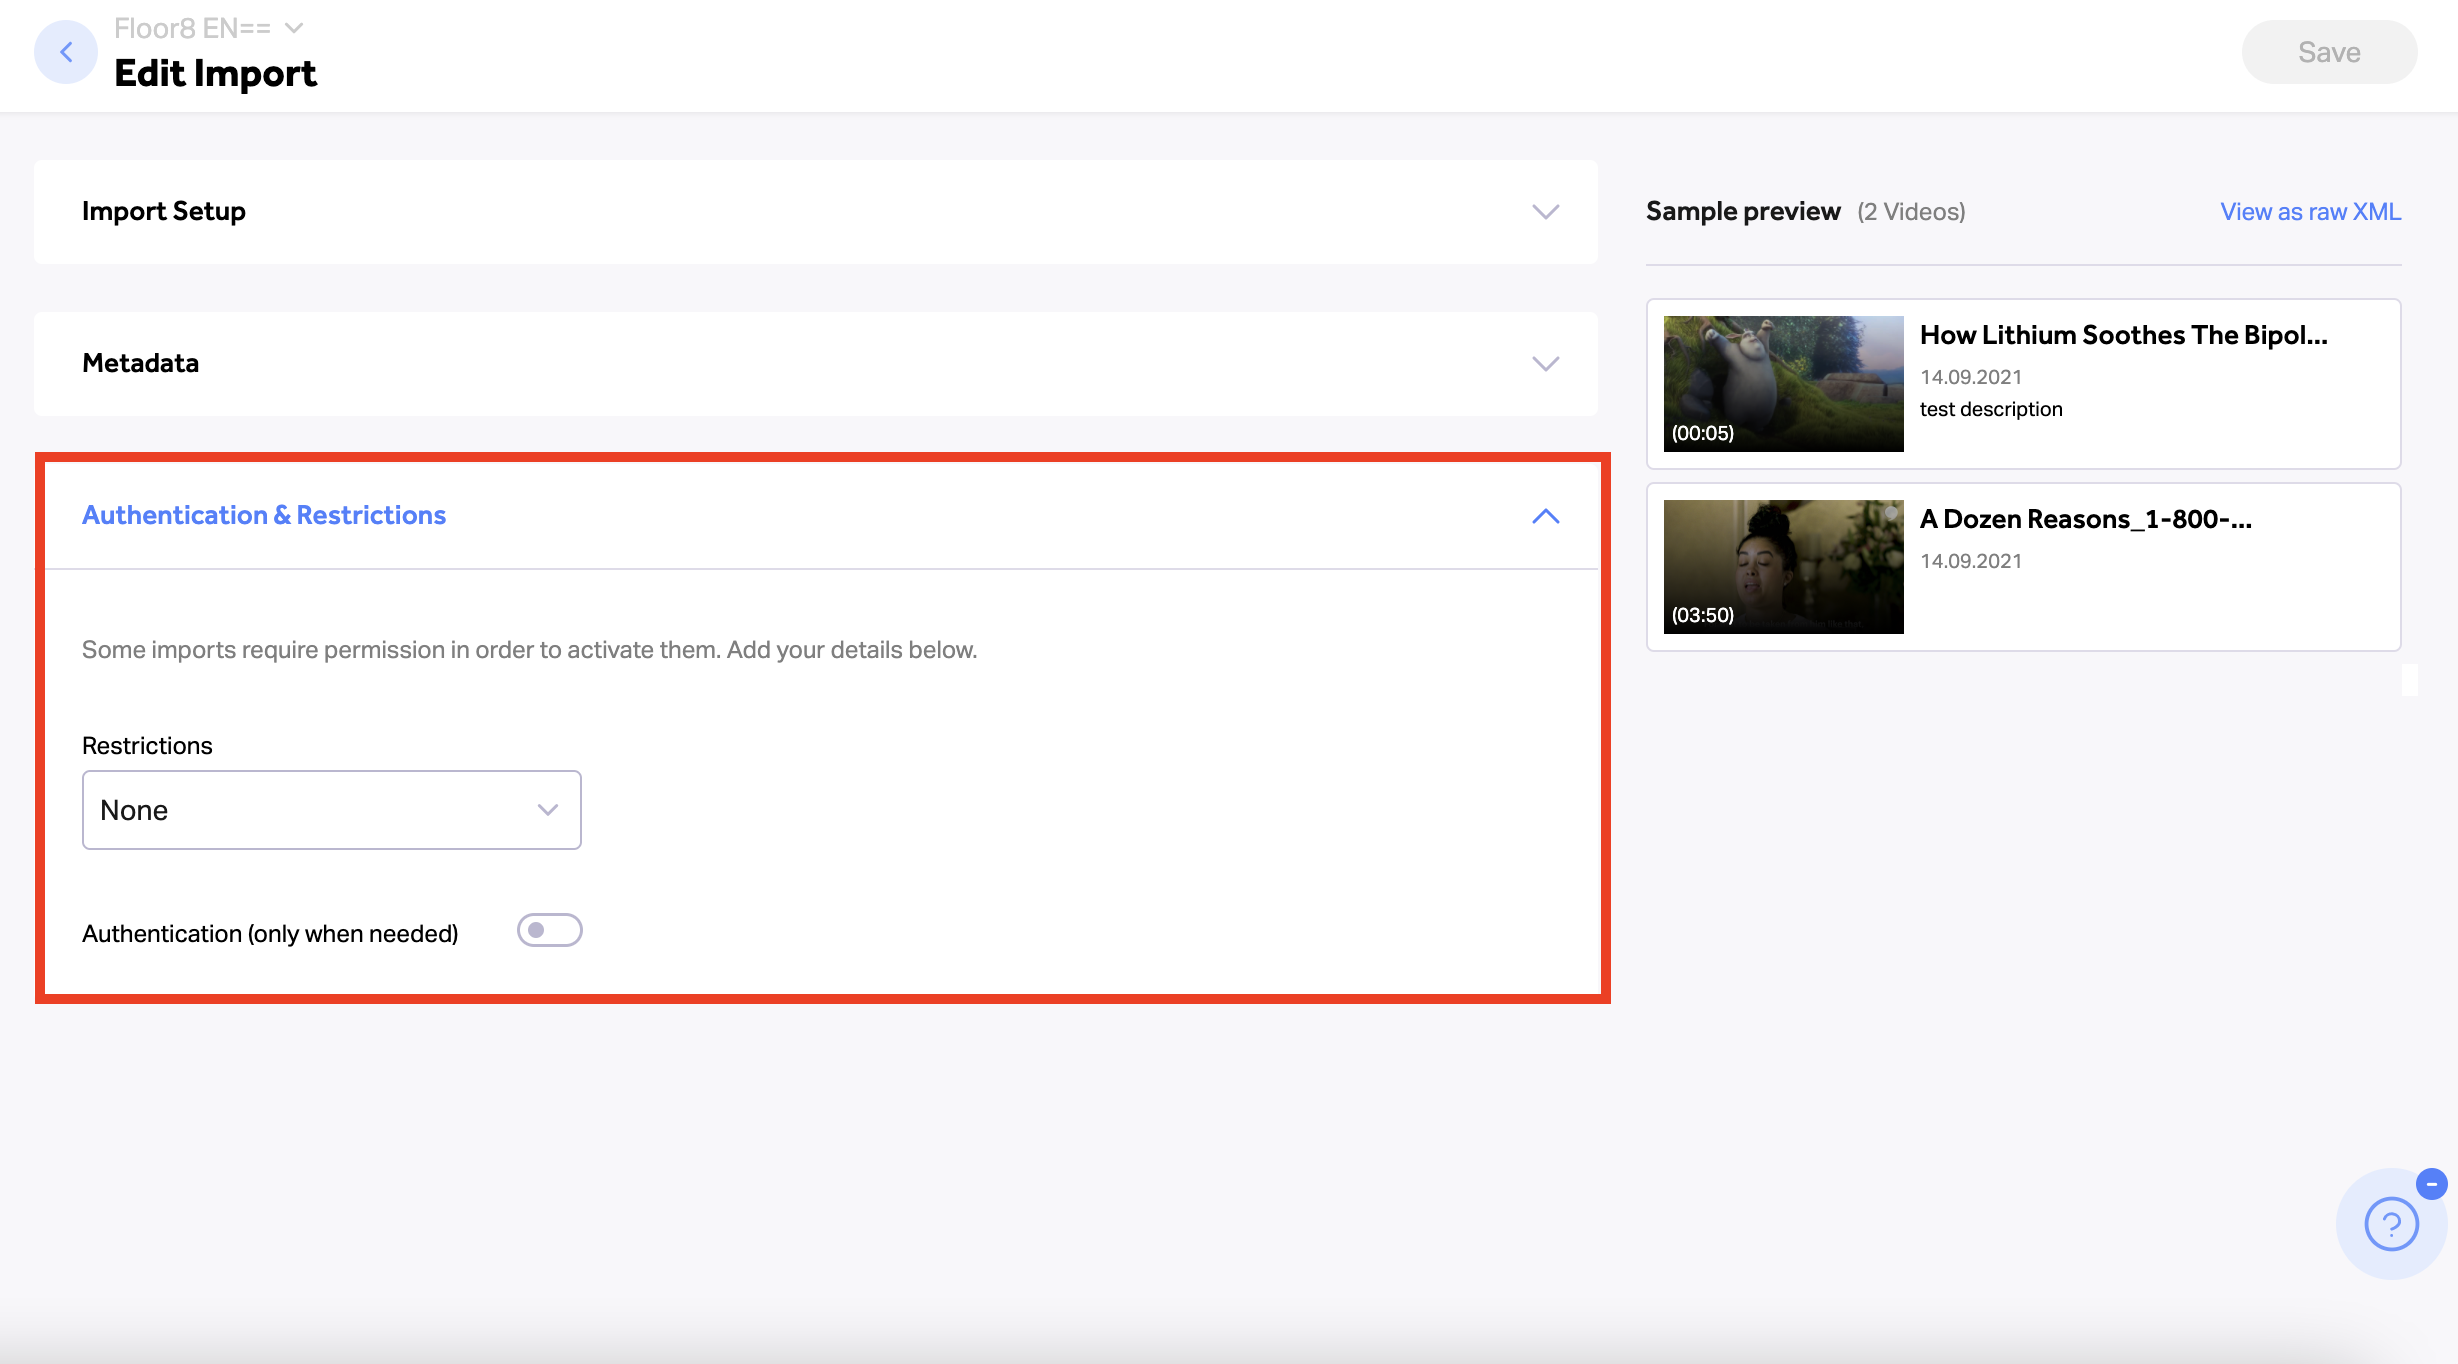
Setting restrictions for entire imports
- Make sure you are in the correct property and using the VMS dropdown menu on the left side of the page, make sure you are in the ‘Imports’ section.
- Select which import you want to add a restriction to
- Scroll down below the ‘Metadata’ section and find the ‘Restrictions’ drop-down menu.
- Select which restriction you’d like to use on the entire import.
- Save your changes in the top-right corner of the page.
Editing restrictions
It is not possible to edit an existing restriction, as it’s attached to different videos or imports. If you wish to change a restriction, you will need to create a new one and assign it to the relevant content.
Deleting a restriction
Restrictions can only be archived, not deleted. If you wish to archive a restriction, click on the “Archive” icon on the restriction’s row.
When a restriction is “Archived”, videos that were previously assigned that restriction will continue to be protected by the same parameters. The restriction will continue to be applied to this content, even after it is “Archived”. Any new content will not have the option of using this restriction, and a new one will have to be created.

To view your archived restrictions, select ‘Archived’ on the drop down.
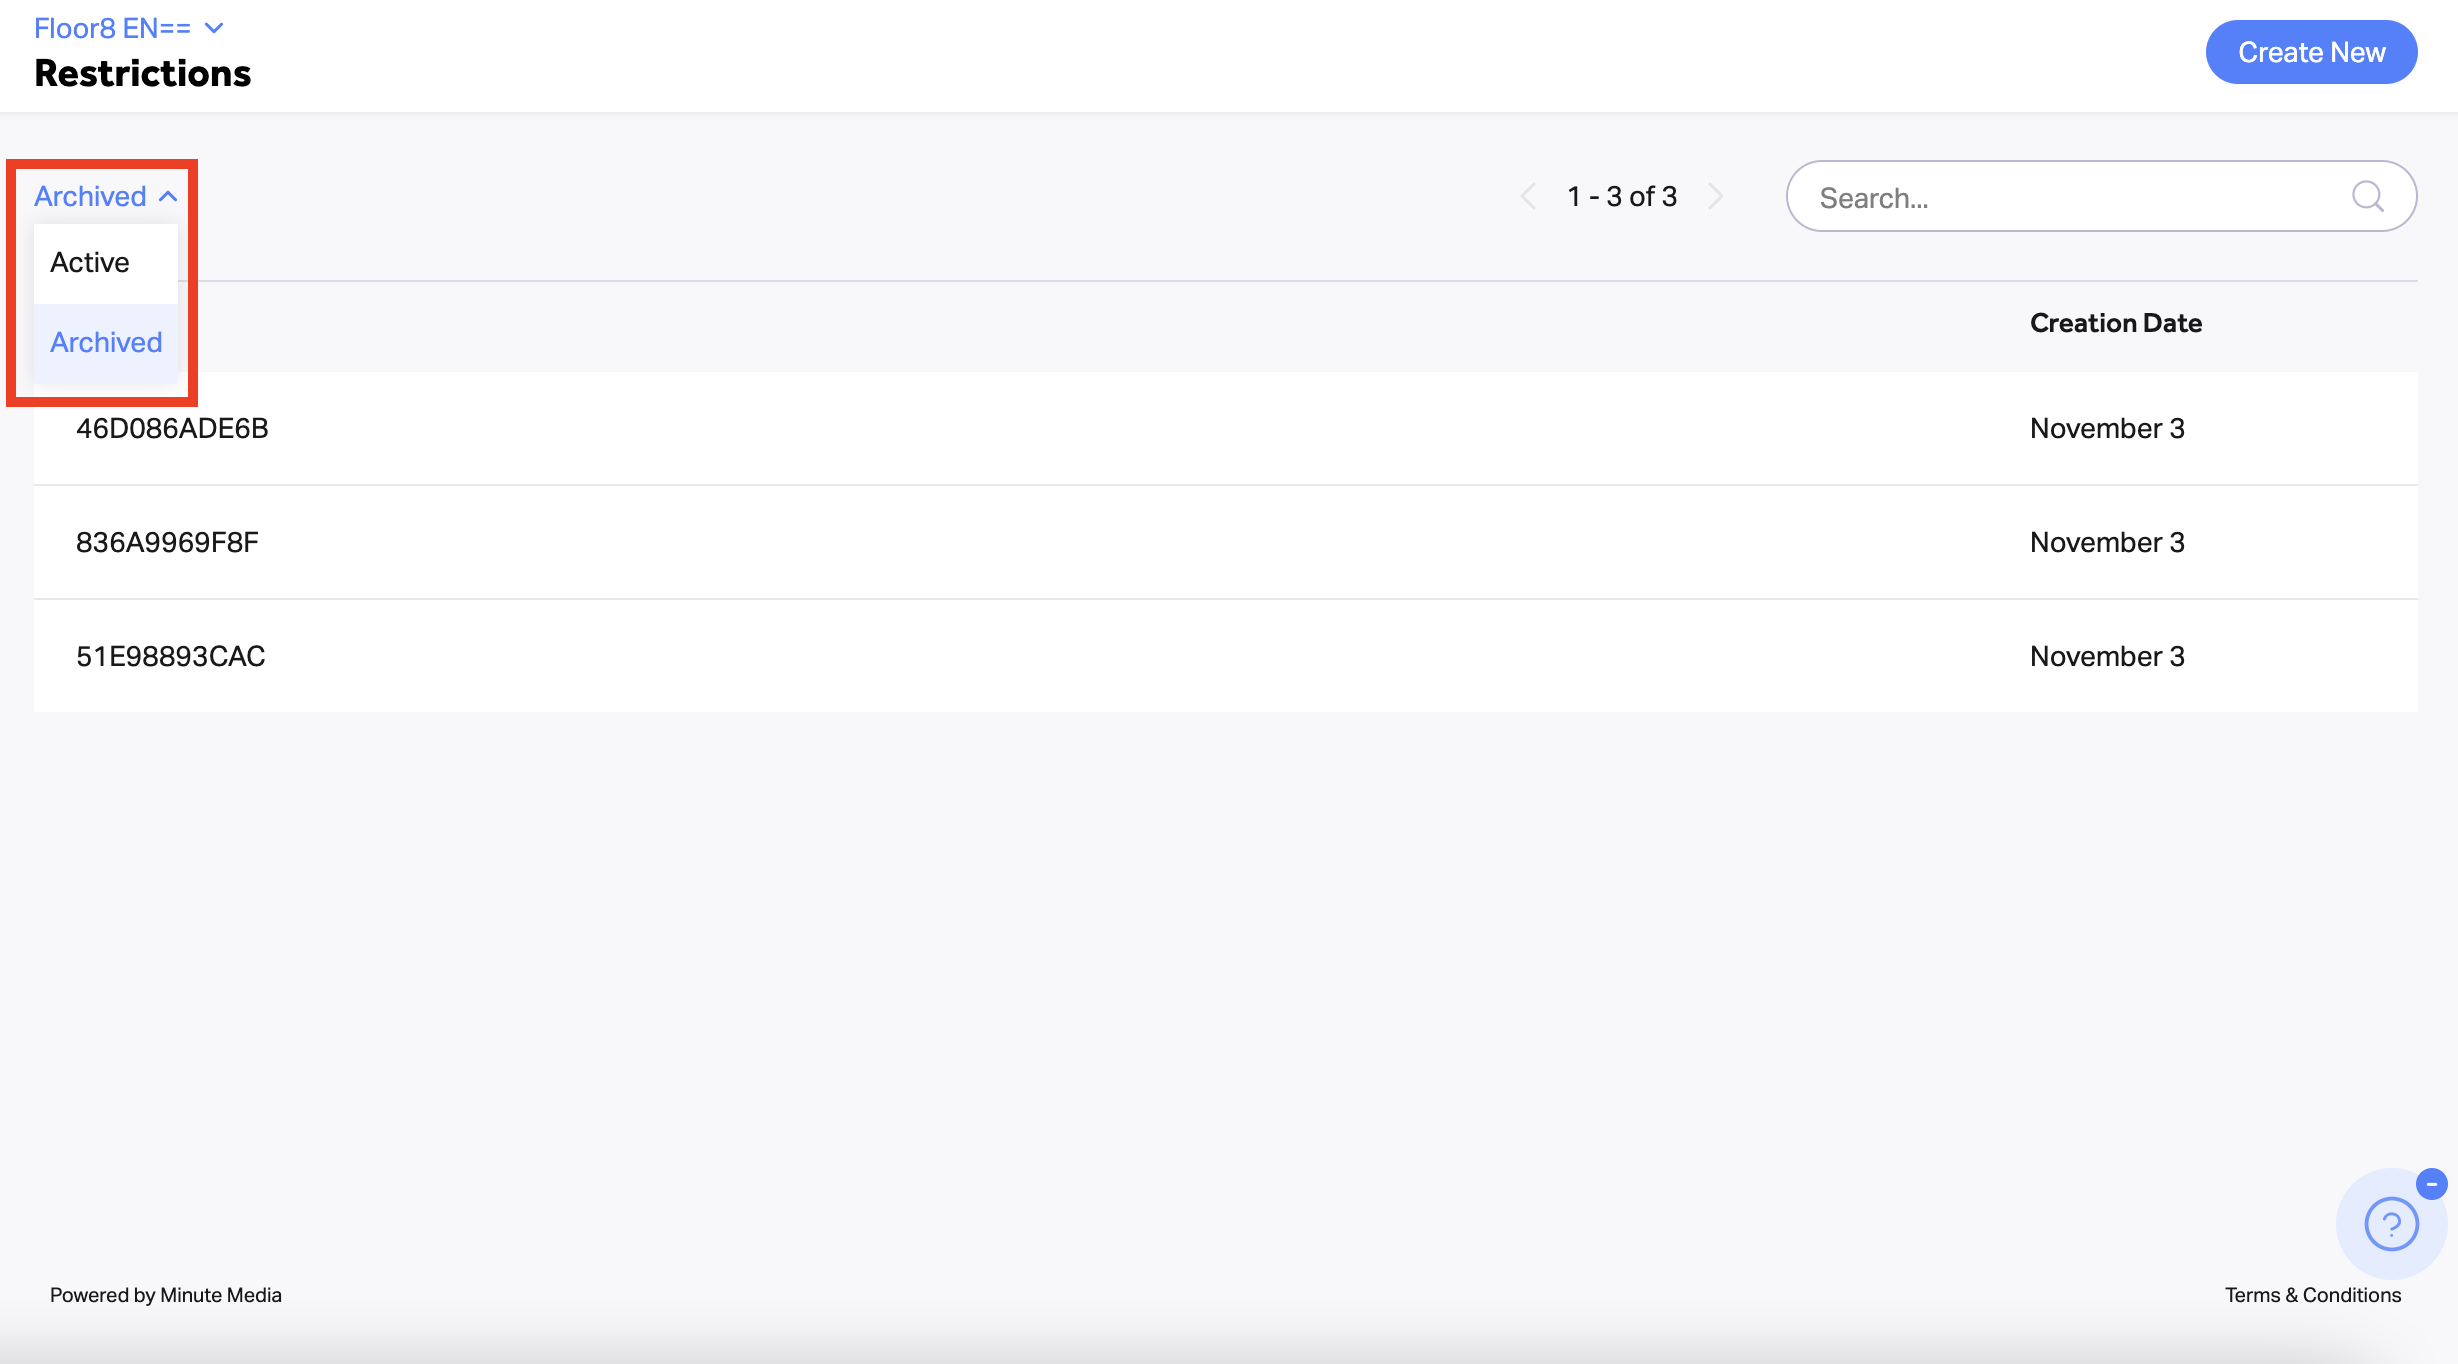
Note: Archive restrictions cannot be activated. To restore a restriction you can duplicate and save it. To do so, click on the “Duplicate” icon on the restrictions row.